
Lightning Infill: How to save material, time and weight!
Your print has been running for hours, the spool is slowly running out of filament, and you ask yourself: is there a more efficient way of doing this? This is where Lightning Infill in 3D printing comes in really handy. This specialised 3D printing infill structure is designed to drastically reduce both print time and material consumption, all without sacrificing surface quality in many common applications.
What exactly is Lightning Infill?
Rather than filling the internal volume of a model with a consistent, repeating pattern like Grid or Gyroid, Lightning Infill takes a more strategic approach. Material is only placed where it is truly needed: to support the top layers. This results in branched, almost tree-like internal structures that resemble lightning bolts - hence the name. The rest of the internal cavity is left intentionally empty to conserve resources.
The efficiency of Lightning Infill
While traditional infill patterns distribute material evenly throughout the entire interior, Lightning Infill is targeted and minimalist. You are no longer printing more material than is strictly necessary. Consequently, using Lightning Infill results in significantly lower filament usage, noticeably faster print times, and much lighter components. For large-scale models or decorative pieces, this can save several hours of printing time and a substantial amount of filament.
When should you use Lightning Infill?
Lightning Infill is most effective when structural strength is not the primary requirement. If you are printing figurines, decorative items, prototypes, or visual models, you will benefit enormously from this efficient structure. In practice, many 3D printing enthusiasts find this to be the greatest advantage: achieving rapid results with minimal material. However, the approach differs for functional parts subjected to mechanical stress. In those instances, classic infill patterns remain the better choice, as Lightning Infill deliberately prioritises speed and weight over maximum internal stability.
Optimising your Lightning Infill settings
To get the best results from Lightning Infill, correct slicer configuration is essential. It is vital to use an adequate number of top layers to ensure the upper surfaces are properly supported. This setting is often the deciding factor in whether a print remains stable or fails. Many modern slicers, including Cura, now feature Lightning Infill as an integrated option that can be activated with just a few clicks. Once enabled, the slicer automatically manages the intelligent distribution of material for you.
Common pitfalls to avoid
A frequent mistake when using Lightning Infill is failing to manage expectations regarding part strength. Attempting to use this method for functional parts will quickly reveal that the internal support is insufficient for such tasks. Furthermore, using too few top layers can lead to an uneven or fragile surface finish. When used for applications where it truly makes sense, Lightning Infill delivers exactly what it promises: efficient printing, reduced waste, and significantly faster printing times.
Conclusion: Smarter printing with Lightning Infill
Ultimately, Lightning Infill is a prime example of how 3D printing technology continues to evolve. It marks a shift away from the idea that "more material equals a better print" towards intelligent solutions that provide exactly what is needed and nothing more. If you are looking to save time and filament on your next project without compromising on the final look, Lightning Infill is well worth a try.
Latest reviews
-
-

AzureFilm PLA Refill Champagne Gold, 1.75 mm / 1000 g
- High strength
- Excellent print quality
- No warping
-

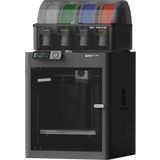
Elegoo Centauri Carbon 2 Combo
- Multicolour printing
- 350°C high-temp nozzle
- Smart build chamber temperature control
-
Magazine Articles:
-
Great Britain: Free standard delivery from £69.90
-
Free
returns More than 10.300 products
We deliver worldwide to
more than 40 countries
