Getting Marlin Firmware Up and Running!
- Getting Started
- Serial Ports, Baud Rate, Bluetooth, Custom Name
- Stepper Drivers
- Sensorless Homing
- Microstepping and Stealthchop
- PSU Control
- Thermal Settings - Thermistor and Max/Min Temp
- PID Settings
- Safety - Cold Extrusion and Thermal Runaway
- Mechanical Settings - Corexy, Belt Printers, Robotic Arms
- Endstop Settings
- Motion Settings - Acceleration, Feedrate, Steps, Linear Advance
- Z-Probe and Bed Levelling, Changing Motor Direction
- Bed Size and Filament Runout Sensors
- M600
- Additional features - EEPROM, Preheat Settings, Nozzle Cleaning, Print Job Timer, Passwords, Language, SD Card Support, Encoder Sensitivity, Speakers, LCDs, Neopixels
One quick note before we start - I will be mentioning line numbers so you can easily find the correct line of firmware, however, depending on what firmware you use or what configuration files you use it may differ a little bit but it is still an easy way to find the correct line.
Also, statements in Marlin are called definitions, they can either be on, off or on with a choosable value. Those that are on are uncommented meaning they don’t have a comment identifier which is a double forward slash. Basically, the double forward slash turns off everything and allows you to write comments if you want to personalise your firmware so it is useful for yourself or others at a later date. Anything written with a // at the start of the line will be totally ignored by the firmware when it is compiled.
1. Getting Started
To edit Marlin firmware you need the right software and while there are a few options, most would use Visual Studio Code. This is free to download on their site here both on Windows, Linux and Mac.
To go with this you also need the Platform IO extension, so once VS code is installed go to the extensions on the toolbar on the left (the 4 squares icon) and search for PlatformIO and click on install. You can also use the plugin for auto-build marlin which makes things slightly quicker when setting up your board with the correct processor but we can also do this the old way and we’ll show you how to do this further down.
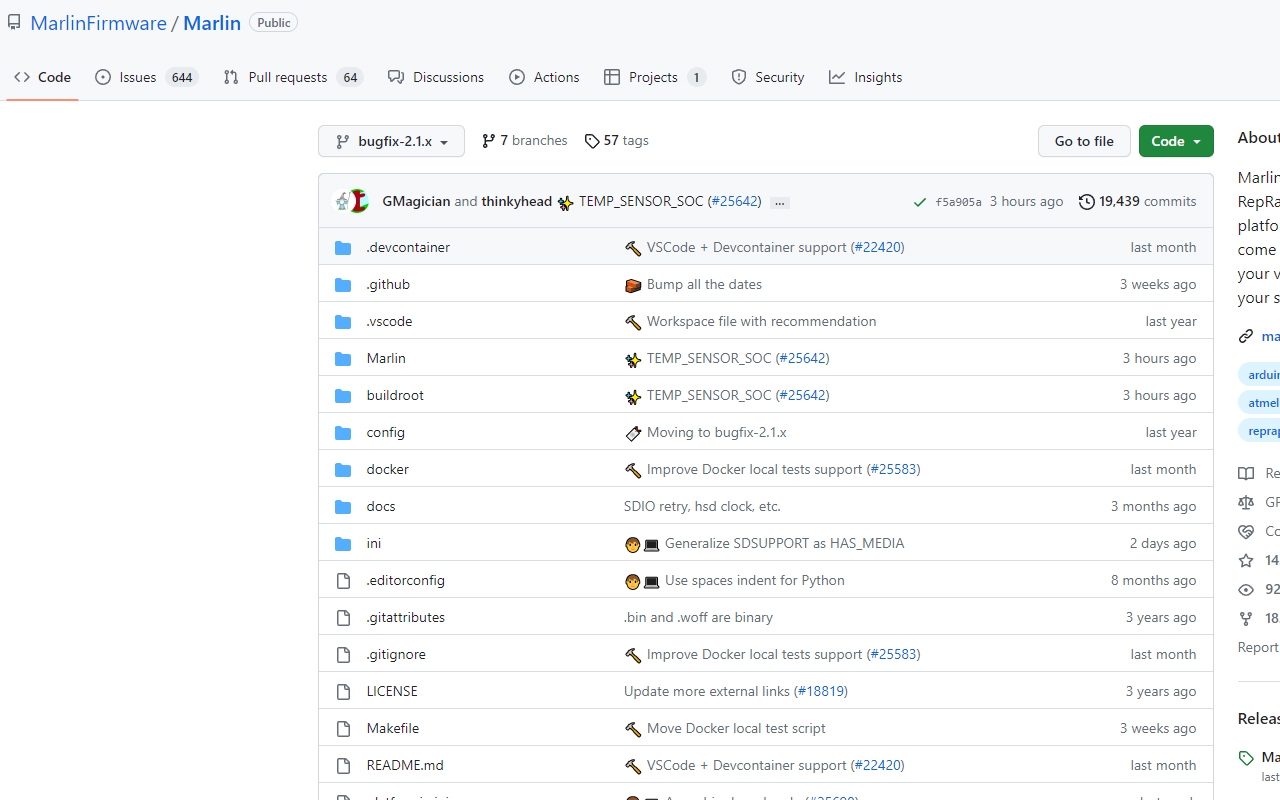
Once you have everything mentioned, we need to get you some Marlin firmware so head over to the Marlin GitHub and download the latest version.
You may notice that there is a bug fix and a regular version. The bugfix version includes the most recent changes to the firmware. This is useful but it may also be the least stable as it is being constantly worked on. However, the Marlin team are great at addressing bugs and errors and fixing them so we’re fond of using these releases.
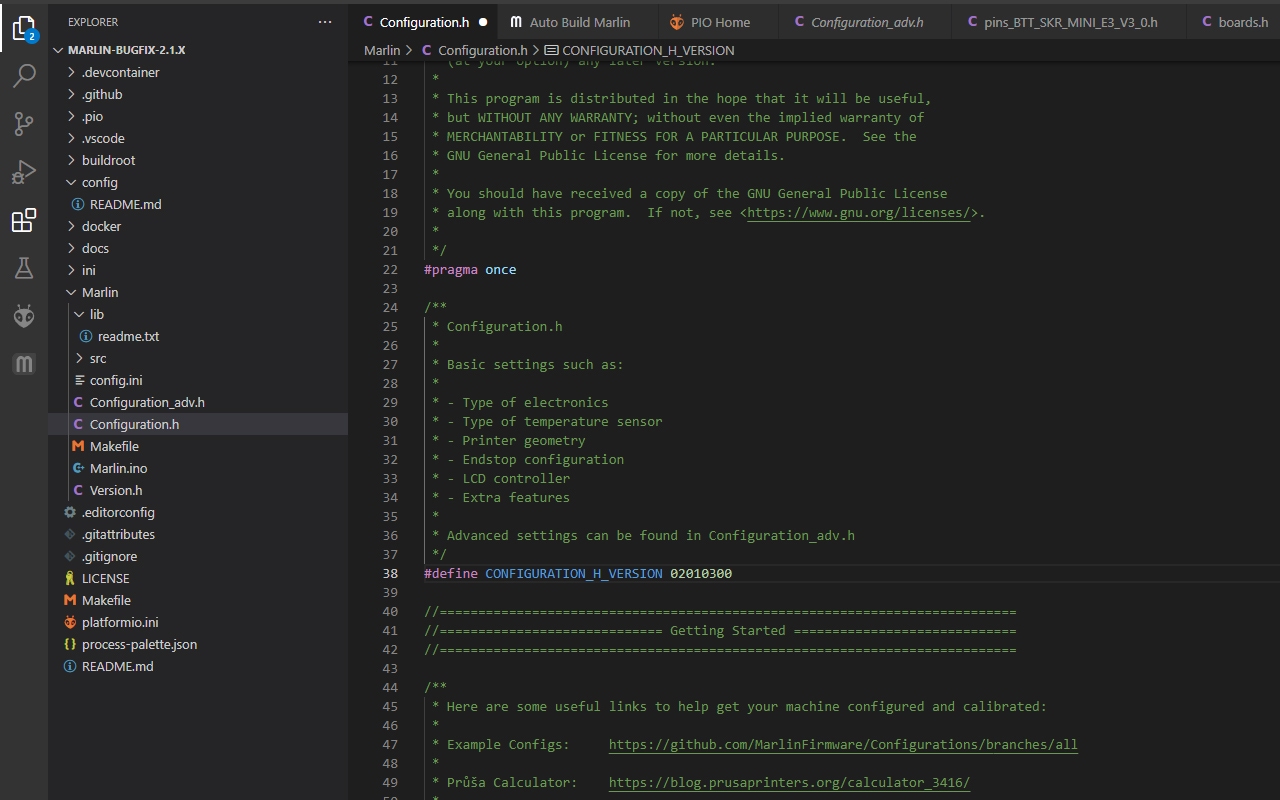
Go in there and click on code on the top right to download the firmware as a zip, unpack the zip and load up VS Code, go to file and open folder and open the marlin firmware.
Next up are configuration files, specific printer configurations can be found on their Github too.
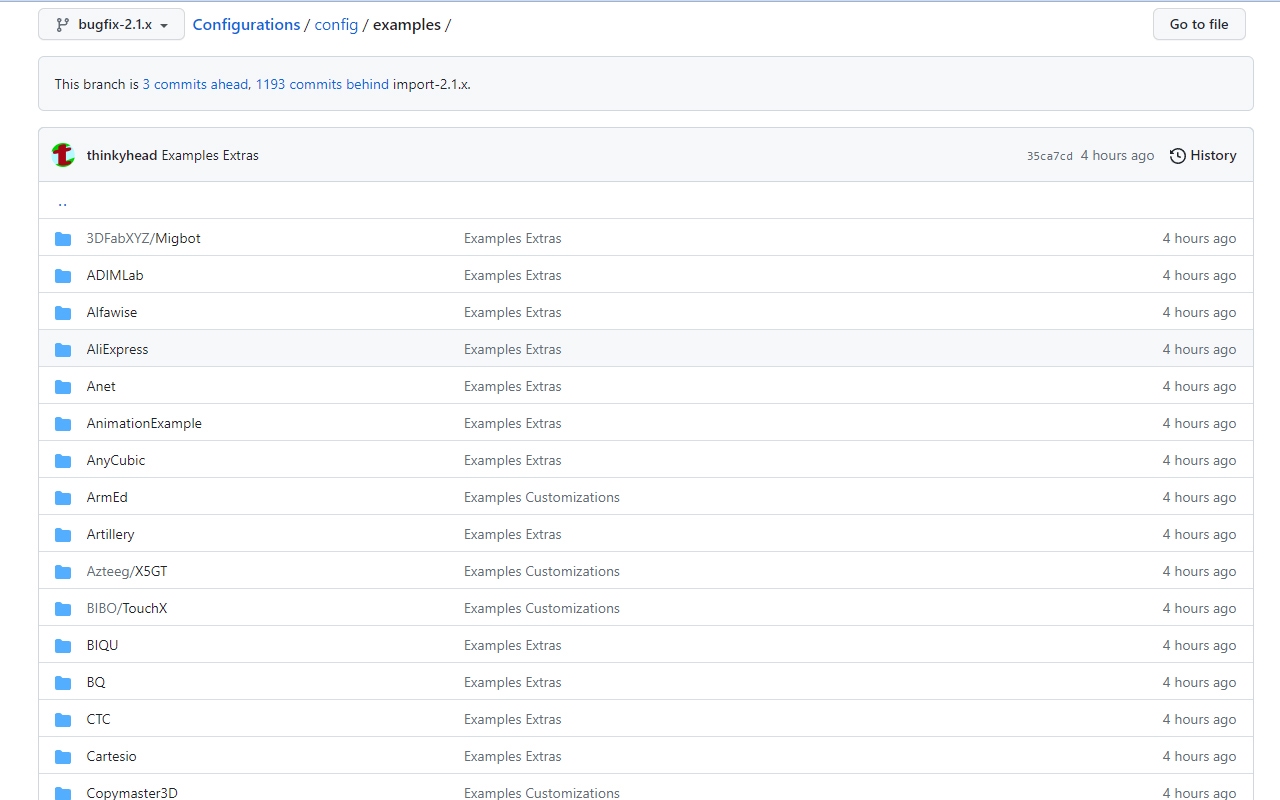
These are really useful especially if you only want to change the firmware a tiny bit, for instance, if you have a printer let’s say an Ender 3 and you just upgraded the hotend and you need to change the thermistor in the firmware then you can simply download the configuration files for that printer and paste them into the Marlin folder you just downloaded. That way all the specifics from the stock printer firmware are now ready and you only need to change the thermistor values.
When you are preparing a firmware folder for editing there is one very important thing that should be addressed before starting to edit and that is selecting the correct mainboard and the correct processor model.
If you go to the configuration.h page in the explorer on the left you’ll see around line 70, there is a command for which mainboard you’re using. For a lot of boards, there is only one version but some have variants or some printers may have used different boards in the past. It would be best to open your printer and check which board you have
To find out how exactly your board is designated in firmware go back to the explorer on the left, go to src, core and boards.h. This is a list of all the boards that Marlin supports. Hit CTRL F and type whatever brand your board is, we can take Creality Ender 3 boards as an example so type in Creality, scroll down to skip past everything to the mentions of that keyword and you’ll see the Creality V4 boards, you can just use the Board_Creality_V4 for the most part. This is basically the same process for any mainboard from any brand as long as it is supported by this version of Marlin. You’ll also notice the processor variants for this board, for the version 4 boards we can see STM32F103RC and STM32F103RE.

Make a note of both of those and go back to Configuration.h and copy the board into the space after #define MOTHERBOARD. Now you can also go to the explorer toolbar on the left side and click on the platform.io tab and make sure the correct processor model is in the default_envs line near the top of the page
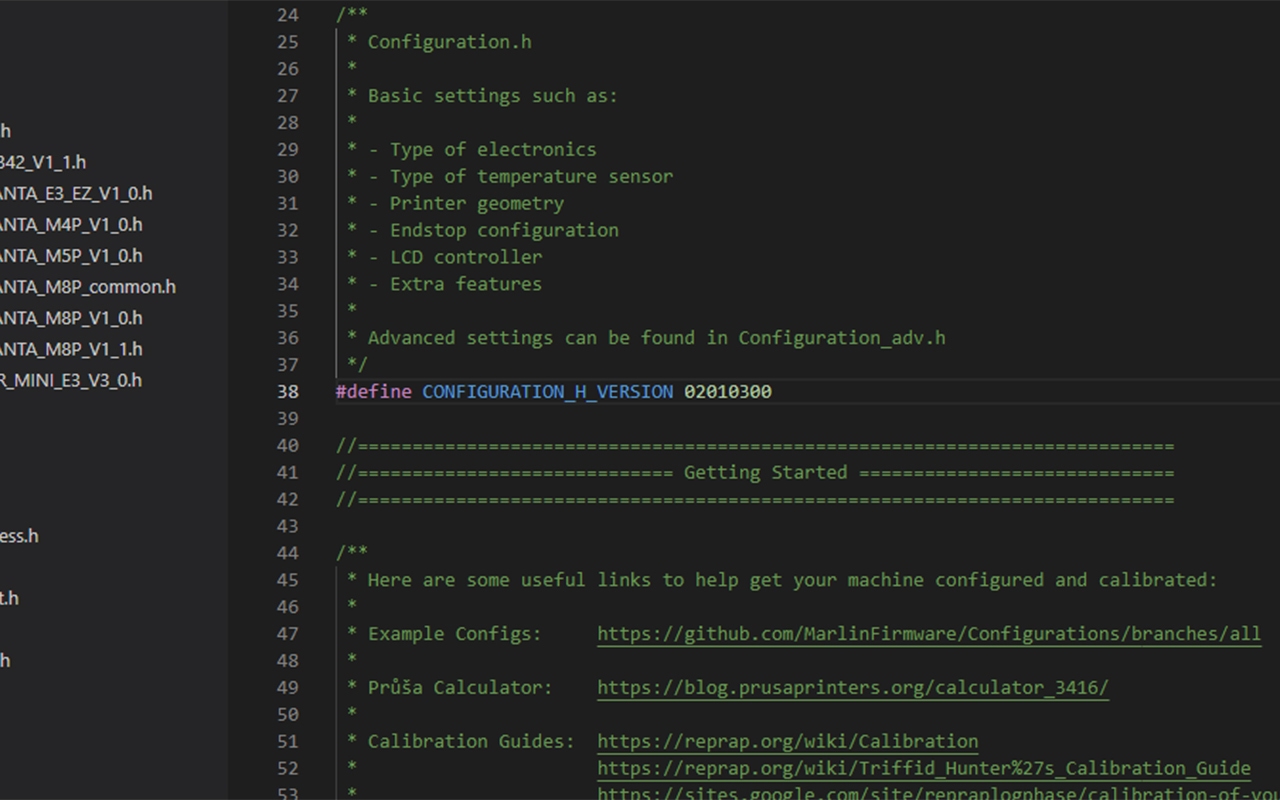
Ok, you’re done, now we can get to editing firmware and there are two main pages which we will be editing, most is on config.h but some also on config_adv.h too.
2. Serial Ports, Baud Rate, Bluetooth, Custom Name
If you go to config.h we can start from there. We have already done the mainboard so let’s continue to the next definition. Serial ports.
Pretty much every printer uses a serial port to connect to different machines. For the most part, only one will be used but if you’re connecting something else like a touchscreen with an SD card or USB port you might have to fiddle with this a bit. We won’t be so we’ll forget about that for the minute.
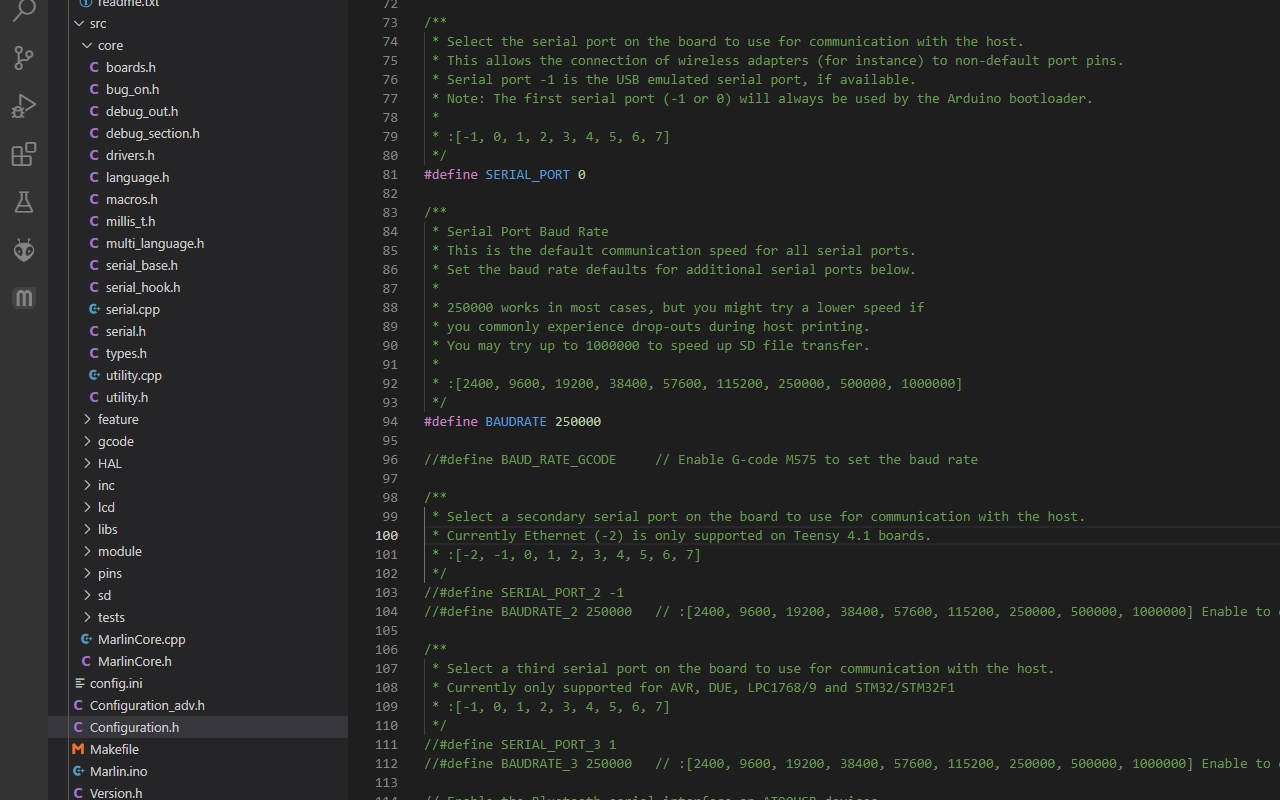
The baudrate is the communication speed for these ports, it may differ but most actually use a 115200 baudrate.
Further down you’ll see more serial port options but we can leave the undefined statements here as you probably won’t need extra serial ports.
You also have options for Bluetooth connectivity which is a pretty uncommon feature on printers and there is also an option for changing your printer name which is by default turned off. You’ll be able to see this name on your LCD when your machine is powered on. Turn it on and enter a name if you feel like it.
3. Stepper Drivers
Next up is stepper drivers. This sounds difficult but it really isn’t. Every printer uses stepper drivers, they control the motors. Back in the day, printers used A4988 or variations, which caused motors to be pretty loud. Nowadays, we have TMC2208 or TMC2209 as the default driver on most printers. But there are tons of other kinds of drivers, each with different characteristics and advantages such as division of steps, max current or sensorless homing which does away with physical limit switches when you home your axes.
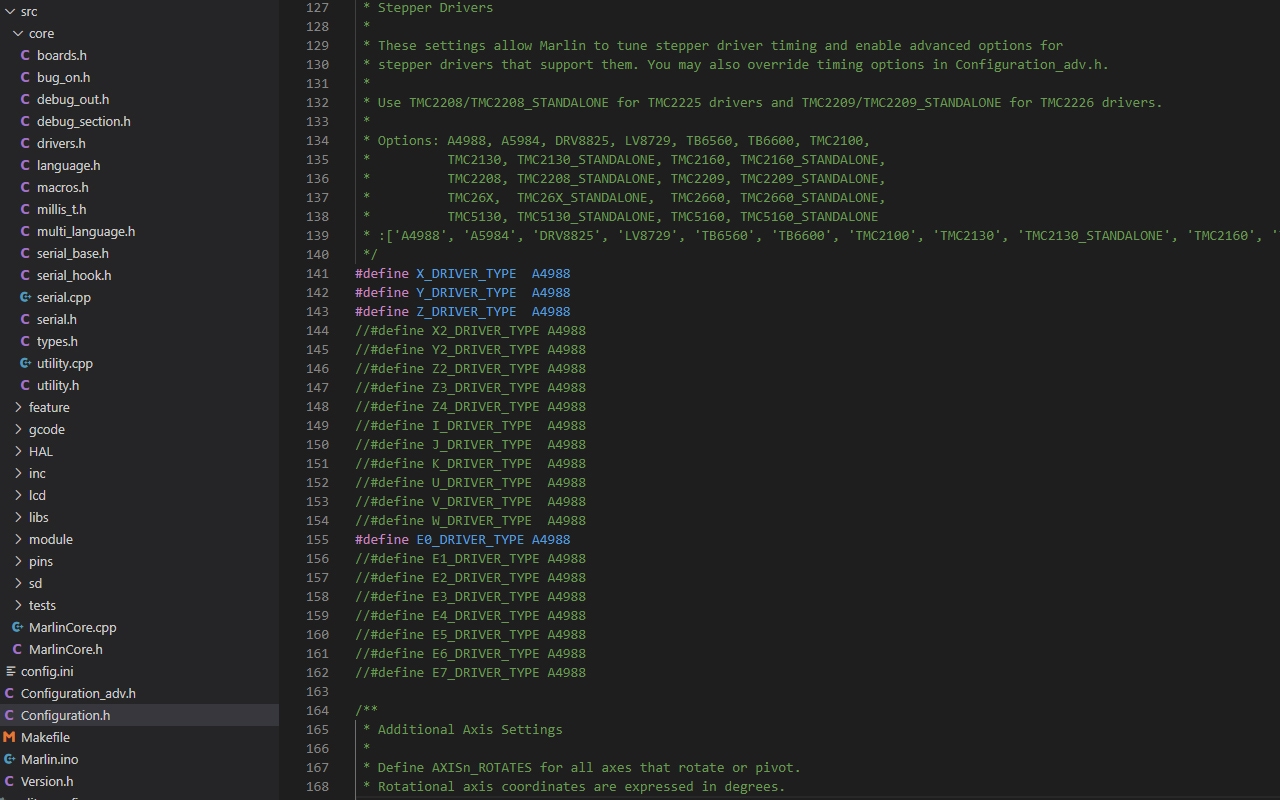
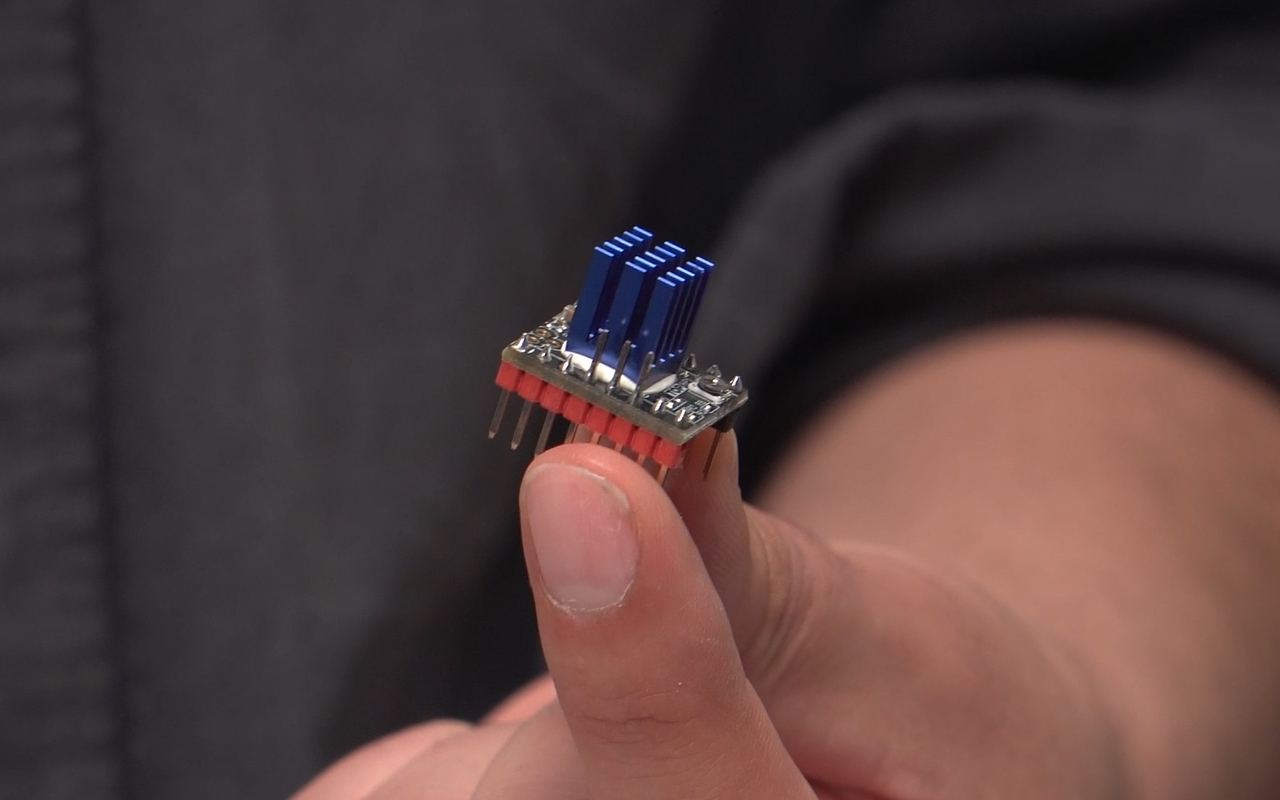
You can simply set which driver you use on which access. A lot of the time a printer mainboard may not say which stepper drivers it is using. Sometimes a board will use integrated stepper drivers meaning they can’t be removed. In this case, it probably won’t say which it uses but sometimes there is a mark on the mainboard that can indicate which it uses. For instance, Creality V4 boards will have a little code written on their SD card port. If it says “T8” that means it is using TMC2208 drivers. Some mainboards will use removable drivers, which has advantages like if one fails you just need to replace it - if that happens with integrated drivers then that’s it - your board is toast and you need a new one.
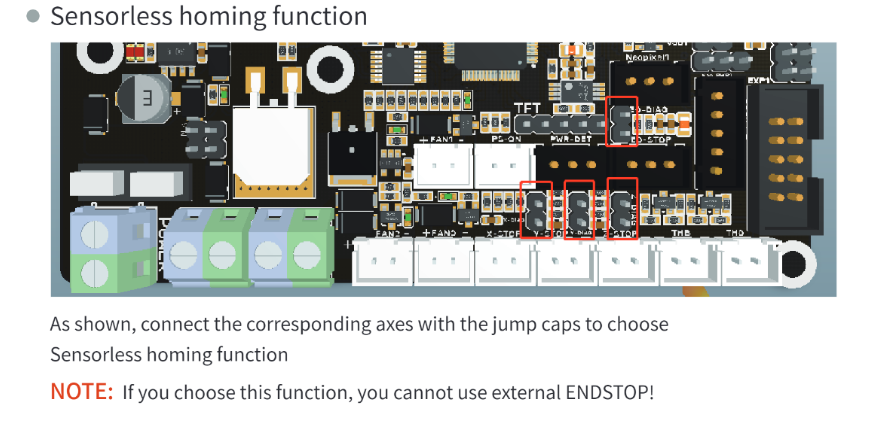
4. Sensorless Homing
I really like sensorless homing and while it is not as accurate as physical endstops it does limit the need for cables and I hate cables. Not all drivers support sensorless homing for instance the very popular TMC2208 drivers can not use this feature. But TMC2209 drivers can.
To get sensorless homing running, there are some physical changes necessary to the mainboard but don’t worry they’re really simple. This can be different depending on the mainboard you’re using but normally it is simply putting jumpers on certain pins. See the SKR Mini E3 Manual.
In terms of firmware, here is what is needed to get sensorless homing working: Firstly, HOMING_BUMP at line 210 (configuration_adv.h) needs to be set to 0 - this is normally used with endstops where the axis will hit the endstop back off a bit and then slowly hit the endstop again. By default it is a few mm, we need it turned off.
At line 1174, ENDSTOP_INTERRUPTS_FEATURE (configuration.h) needs to be undefined.
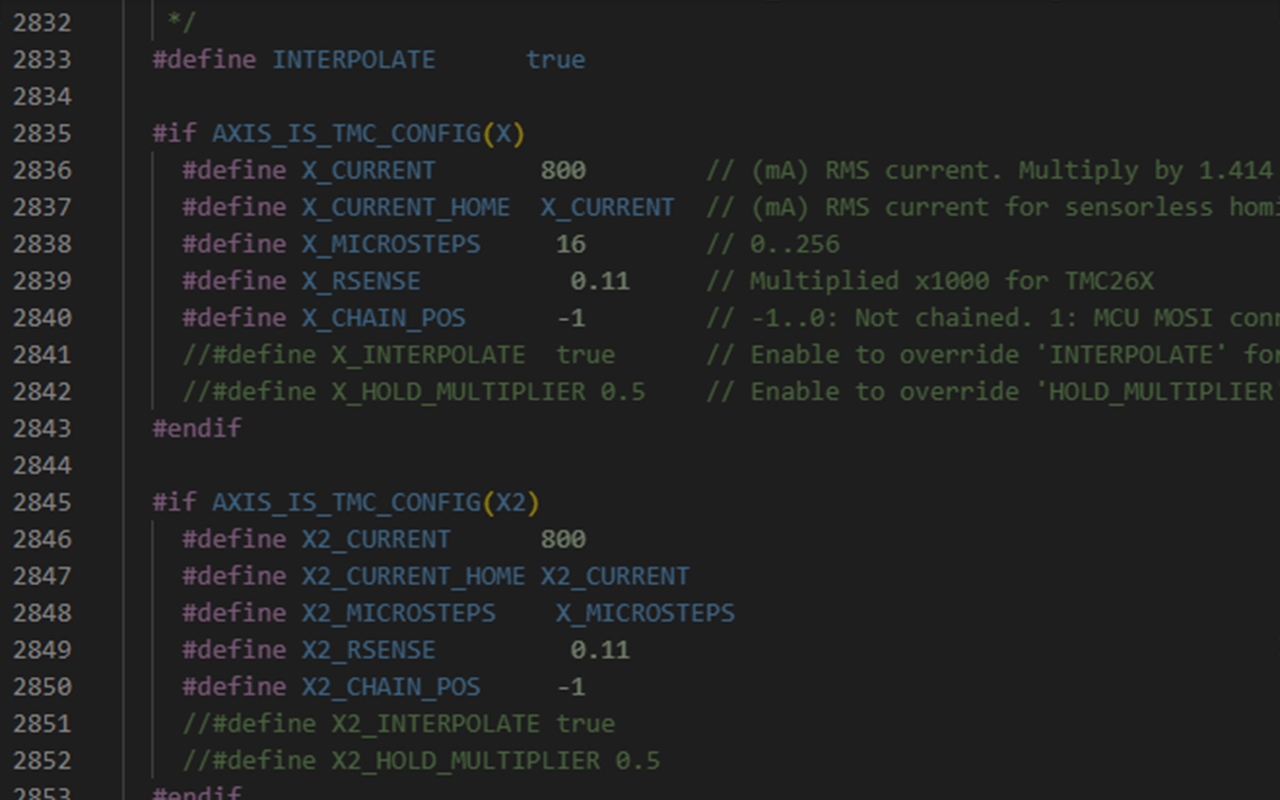
Next is current. What is lovely about these mainboards compared to older ones is that the motor current couldn’t be changed via firmware on old 8-bit boards. You would need to change the Vref on the mainboard by turning a little trim pot which was really sensitive, turn it a tiny bit and it flies off to 1.5 when you only need it at 0.8 (or 800mA) for most xy motors. Find the lines for adjusting current starting at 2386 (configuration_adv.h).
The amount of current you need on your firmware depends on the stepper driver and motor. If you’re getting a pretty average motor like a 42-34 motor your current value only needs to be 800 here. If you find a technical data sheet for your motor you might see it’s max current is 1.5a or 1500mA do not enter 1500 in the firmware, that is an absolute peak value, we don’t deal with peak values, that would end badly. We’re looking for the RMS value, the root mean squared current. Calculating the correct current is not actually so straightforward but there are calculators that you can find online to help you with this such as this one by ALL3DP.
Current management is absolutely pivotal when calibrating sensorless homing as you might need to fiddle with it a bit when making sure it works optimally.
MONITOR_DRIVER_STATUS is at Line 3204 (configuration_adv.h) - this periodically checks the drivers to determine their status. Marlin can automatically reduce the driver current if the driver reports an overtemperature pre-warn condition. Turn this on.
You can also enable TMC_DEBUG at line 3317 (configuration_adv.h) where you can see more info about the stepper drivers.
Ok now we can turn on SENSORLESS_HOMING at line 3272 (configuration_adv.h), we need to turn this on for X and Y and set the stall sensitivity, this is how sensitively the drivers can measure the stall, that is when the motor moves the printhead to one side of its axis and hits the end. This is more of a trial and error process, if it is too low it won’t detect anything and keep turning the motor even when the printhead crashes into the side, if it is too high it will just constantly “detect” the stall even when the printhead is just sitting there. After flashing the firmware, the LCD will now have a menu to change the stall sensitivity values and the current too so you just need to change this to make it suit by trying, failing, trying again, failing again and so forth. The stall values run from 0-255 so the first attempt should be made in the middle around 128, if it crashes, it is too low so raise it, if it doesn’t make it to the end it is too high so reduce it. Adjust accordingly and try again and again and again. If you are totally lost and no matter what value you choose it doesn’t work then you need to adjust the current, just raise it a bit. ONLY A BIT!! If it is 800 milliamps, raise it to 850 and try again.
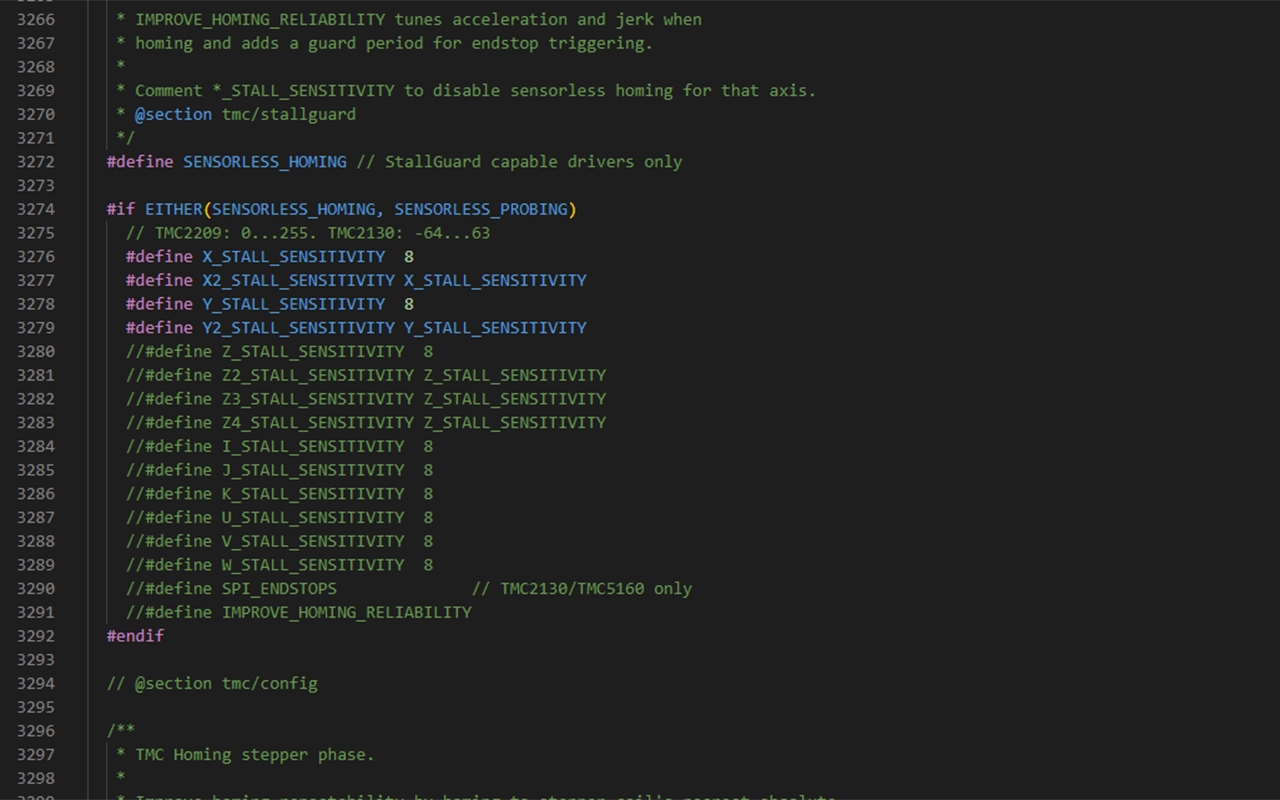
You can also use define IMPROVE_HOMING_RELIABILITY a little further down at line 3291, which is exactly what it sounds like.
In case you’re wondering, getting sensorless homing on the Z-axis is difficult, especially with printers which use leadscrews for the Z-motion which is most printers. To save yourself any trouble here don’t turn on sensorless homing for the z-axis.
5. Microstepping and Stealthchop
At line 2838 there is another driver feature X_MICROSTEPS (configuration_adv.h). Stepper drivers move in steps, most 1.8 degrees for each step which is really accurate but can you be more accurate? Aside from getting another motor that has a smaller degree per step, you can use micro stepping which tells the driver to signal the motor in a way that can move the motor less than 1.8 degrees which is pretty handy for super accurate adjustment. The default is 16 but you can go higher, of course, this means that the number of steps required to move a motor a certain distance will also change so Marlin has this lovely feature called interpolate at line 2833 (configuration_adv.h), setting this to true will “interpolate” each motor stepping value automatically so you don’t need to change anything manually. So if you turned microstepping from 16 to 32 you would have to adjust the steps for all the motors to fit the new value, turning on interpolate does this automatically for you.
Next up is STEALTHCHOP at line 3140 (configuration_adv.h). Turn this on, it makes everything super quiet - you should also check CHOPPER_TIMING CHOPPER_DEFAULT just below. You’re more than likely running a 24v printer so turn it to 24v. Of course, the ability to use stealthchop also depends on your driver but luckily most these days can use it.
6. PSU Control
Going back to Configuration.h we have PSU control at line 388 (configuration.h) which can be interesting if we want to automatically shut down our printer after it has completed a print job.
7. Thermal Settings - Thermistor and Max/Min Temp
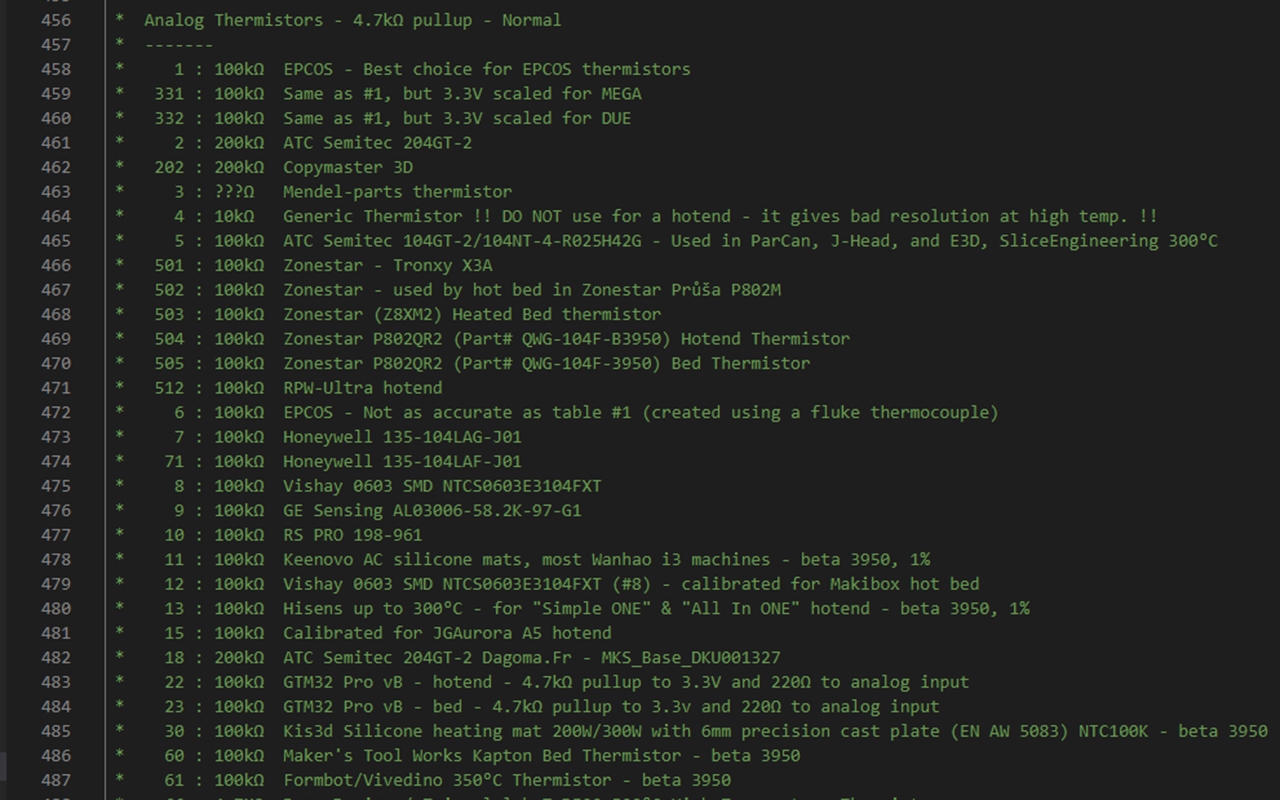
Next is thermal settings at line 430 (configuration.h) and this is probably the most requested firmware tutorial ever. For lots of people, a hotend upgrade is the first mod they do. So if you have an Ender 3 and you’re upgrading to a Revo hotend, what do you do? Well, there are two things to change, the first is the thermistor. Most printers use a 100k thermistor, for which the sensor type is “1” in Marlin. But the Revo and lots of other thermistors use the number 5 which is also a 100k thermistor but from Semitec. As you see, there are a few brands that use this thermistor type. But maybe you’re upgrading to something heftier like a PT1000, well that would depend on the PT1000 but most use the number 1047 sensor with a 4.7ohm pullup.
You can do the same for temp_sensor_bed here at line 536 (configuration.h).
The other part of hotend upgrading is the HEATER_0_MAXTEMP at line 611 (configuration.h). PTFE hotends are generally limited to 260C which is written as 275C in marlin. I’m not actually sure why this was done but whatever temperature you enter here the actual reachable temperature on your printer will be 15C less. So if you have a 300C hotend then you need to write 315C for your max value.
You may also see HEATER_0_MINTEMP here at line 597, this will automatically turn the heater off when it reaches this temperature. BTW if you do have a printer that turns off the heating or gives you a mintemp error and you’re not sure why it may be because your printer is in an environment that is too cold. We actually get a lot of questions in winter about this, lots of people have printers in their garages and that can easily happen.
On line 623 you have a thermal overshoot (configuration.h) which allows temperatures over the maxtemp value before it shuts things down. Overshoots can happen when your heater is not calibrated which brings us to line 633 and PID tuning (configuration.h).
8. PID Settings
This syncs the heater and thermistor so that the heating is accurate. The important part here is from line 659, there are the default values for your Proportional, Integral, and Derivative, you don’t really need to change anything here but when switching hotends it is a good idea to run a PID tune which essentially calibrates your heater or thermistor so that the temperature does not fluctuate much when your printer is running. So I would recommend doing this after a hotend upgrade. There are a few ways to do this but an easy way is enabling it in your LCD menu on line 803. Other methods would be connecting your printer via USB to your computer and using a terminal program like Pronterface.
You can enter gcode commands in this terminal and the correct one for PID tuning is “M303 E0 S210 C10 U”.
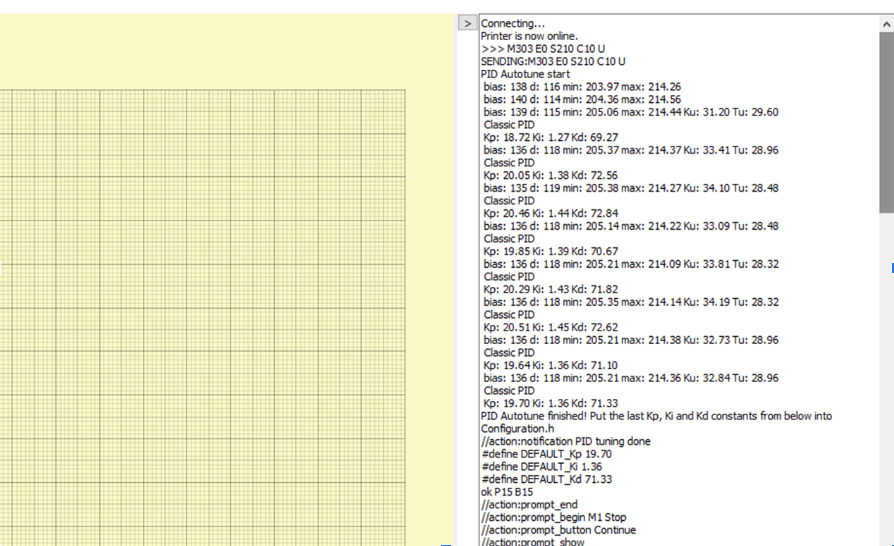
Here, M303 is the command to start the tuning process.
E0 refers to the heater you’re using (E0 is the default for almost all single extruder printers)
S210 refers to the temperature at 210C which is suitable for PLA but you can change it if you mostly use other filaments.
C7 refers to how many times the test should be carried out. The more you do the more accurate it is but we find you don’t need to go over 7.
Once you have entered this command it will run the test and return values for Kp, Ki and Kd.
Once you can have them you can add them to the terminal with the M301 command like
M301 P30 I3 D60
Then save your settings with an M500 command and that’s it, you’re done.
There is some more about PID bed and chamber control. PID tuning for your bed is not as necessary as your hotend, hotend changes are considerably more frequent than changing the thermistor on your bed, but it is there if you need to turn it on.
9. Safety - Cold Extrusion and Thermal Runaway
Next is thermal runaway protection at line 827 (configuration.h) which is important, turn it on! This shuts your printer down if the temperature changes beyond what is expected. Maybe the thermistor has become dislodged and you don’t know, without this feature the temperature will just go up and up and the thermistor reading will barely change. This is bad. TURN IT ON!
There is also a feature for preventing cold extrusion at line 816 (configuration.h). This prevents the extruder motor from being activated if the temperature is less than the inputted value. Here it is set as default at 170, which filament you normally use on your printer will tell you which value should be used here. If you’re printing PETG most of the time, for instance, you should have a temperature of around 220C
10. Mechanical settings - CoreXY, Belt Printer, Robot Arm
Next is mechanical settings and as we’re going to be using a coreXY set up this is really important. We need to define Corexy here.
There are also other kinematics here like delta, belt printers or if you have a robot arm that’s also possible.
11. Endstop Settings and Endstop Noise Threshold
Next are endstop settings at line 1071 (configuration.h). This is simply for turning on your endstops.
There is another little feature here for Endstop Noise Threshold. A long time ago I had to use this feature when I put extra long cables on a printer so that all the electronics were outside an enclosure. For some reason the long cables caused mishits to be detected when homing but this feature saved the day.
12. Motion Settings - Acceleration, Steps, Feed Rate, Jerk, Junction Deviation, Linear Advance
Next up is movement settings at 1194 (configuration.h) and first up are default steps. As was mentioned stepper motors rotate in steps every 1.8 degrees in separation (unless you have a 0.9), when the motor turns a belt or a lead screw or a gear it needs to turn a specific amount of steps for that piece to move the required amount. You’ll most commonly need to change this for extruder upgrades, really you only need to change the number in this line. Normally manufacturers give the steps of the extruder (or esteps) but you might need to adjust this so for this we do an esteps calibration. There are a lot of videos on this.
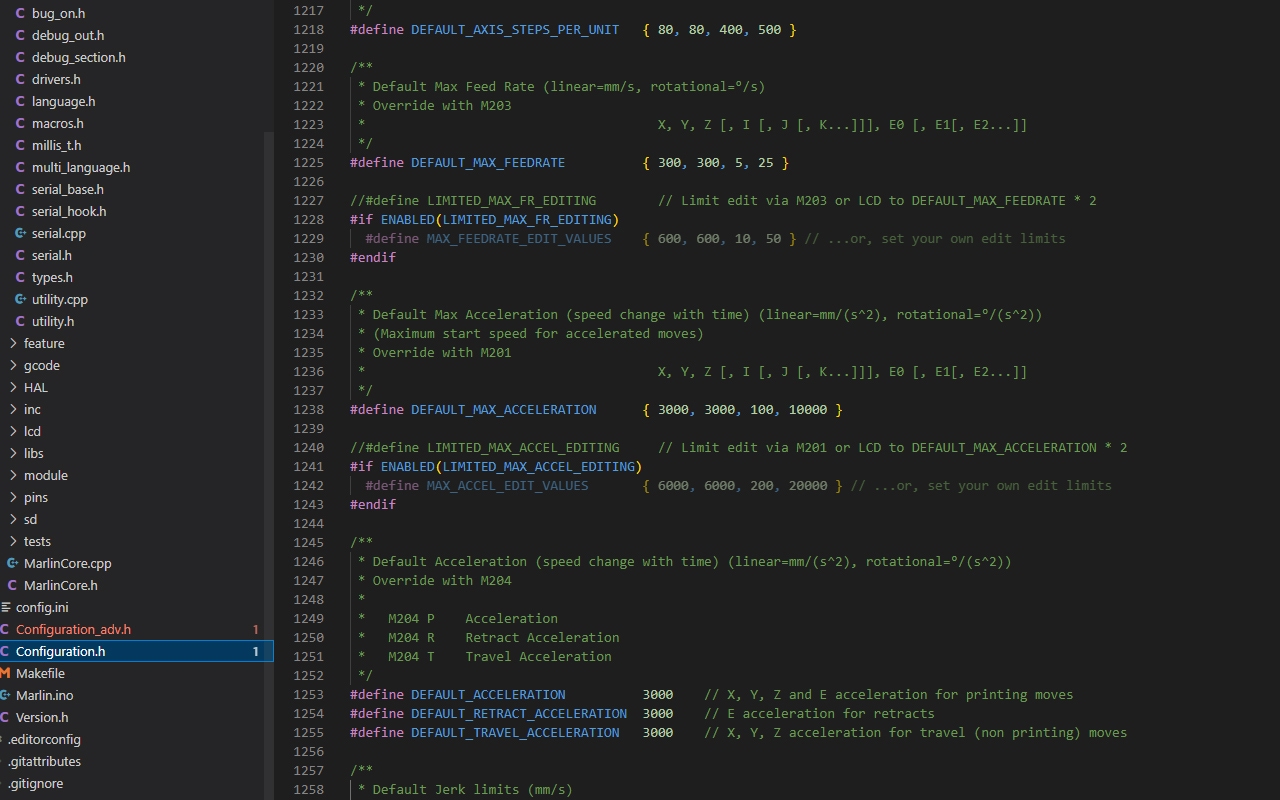
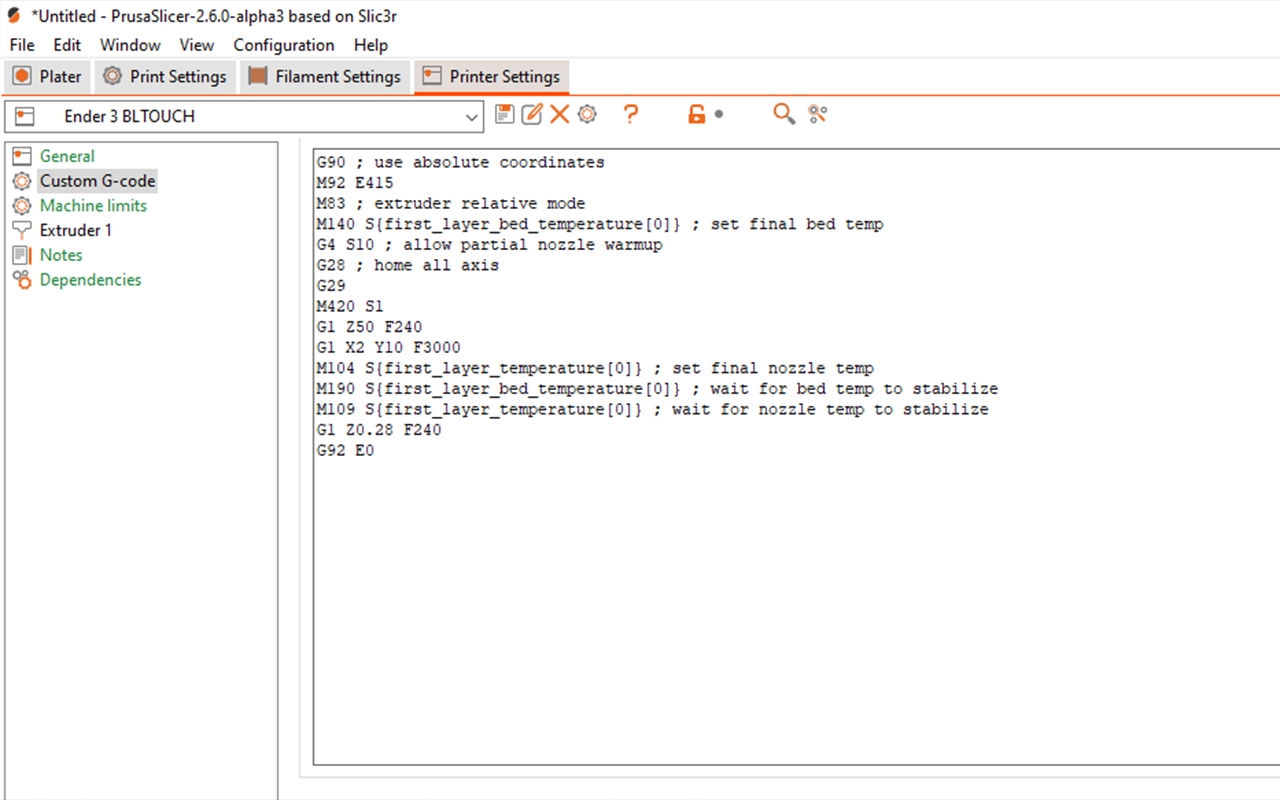
Esteps and actually all stepping values don’t have to be configured in firmware, you can just edit your start gcode to include a new value with an M92 Command, that is the easiest way to do it if you upgrade your extruder, you don’t need to update your firmware for most cases, you can just use gcode either in your slicer or via Pronterface as we showed earlier. This can actually be done for all the values in the movement settings category with M203 for max feedrate, M201 for max acceleration, m204 for default acceleration and M205 for jerk settings. For example, changing the extruder steps for a new Bondtech extruder might be as simple as writing M92 E415 in your start gcode (M92 being the command to change steps on a motor and E specifying it is for the extruder motor), that’s it so these are not set in stone and we can change them really easily without a firmware change.
By the way, if you’re interested in gcode commands in general and the parameters used with them you can check out Marlin’s website for this, they give a list of all gcode commands some of which you might find very useful. Here is an example of the M204 startup acceleration gcode.
Jerk is a feature that limits the rate of change of acceleration of an axis mostly for when the printhead is standing still and then suddenly starts moving but it also applies to 90-degree turns. It is a relatively old feature in firmware, lots of printers still use it but newer ones especially those that run Klipper firmware will use something called junction deviation so let’s look at that.
In terms of firmware changes this is very simple, go to line 1288 and define junction deviation, also make sure classic_jerk on line 1265 is undefined (configuration.h). That is the firmware part done but you need to find the junction deviation value, by default it is set as 0.013mm but it totally depends on your printer. Luckily it is a simple test to do, all we need to do is print a model where each layer is a slightly different junction deviation value and then see which layer printed best. If you notice a lot of ringing then that value is too high. But you don’t want it too low or that will slow things down.
TeachingTech has a great guide and calculator.
Next is S-Curve acceleration at line 1301 (configuration.h) which reduces vibrations and like the jerk feature, is relatively old and sidelined in favour of new features. One of those is linear advance, what’s that? Well, this controls the rate of extruded volume during acceleration changes. Ever notice when printing 90-degree corners, the print might bulge a bit there? That is what linear advance aims to fix.
In terms of firmware, it is a lot like junction deviation. Go to line 2205 of configuration_adv.h and you’ll find it (configuration_adv.h). All you need to do is uncomment it so it is defined. After that you need to calibrate it to find the right value, we call it the k value, by default it is 0.22.
K value calibration is a lot like the junction deviation value calibration, we print something with varying values and see which works best. Luckily, Marlin has an absolutely brilliant calculator that you can use to work it all out.
13. Z-Probe, Levelling the Bed, Changing the Direction of Motor
Now at line 1311, we get to bed levelling and z probes (configuration.h) and this is an absolutely massive section as there are lots of different methods of levelling not just auto-levelling add-ons but a lot of other things too. If you want to learn about firmware for the BLTouch or similar devices, I recommend the video from TeachingTech about getting a BLTouch to work on virtually any device.
Do you need to reverse the direction of your motor? Sometimes this is necessary with extruder upgrades or stepper driver changes, there are a lot of features in Marlin which would require you to invert the direction but you don’t have to do it now. When you compile your firmware and flash it just try to move a motor and see if it goes in the right direction. When you need to change the direction go to line 1698 and change INVERT_[X/Y/Z]_DIR to false or true
14. Bed Size and Filament Runout Sensors
Next up at line 1753 is the bed size (configuration.h). Beds should have a bit of margin so you don’t want your model printing too close to the edge of the bed so we can set our min_position as 0, which will be the point where the endstop or sensorless homing stops that axis when auto-homing, that might require a bit of margin or not, it really depends on the geometry of your carriage and bed position, maybe the endstop point is already an appropriate distance away from the edge of the bed or maybe it isn’t even on the bed in which case you need a margin so just edit the min_position to include your margin in mm and then move the carriage to the opposite side of the bed to the point where it should not go beyond and that is your max_postion, that is the point at which all travel moves are limited to.
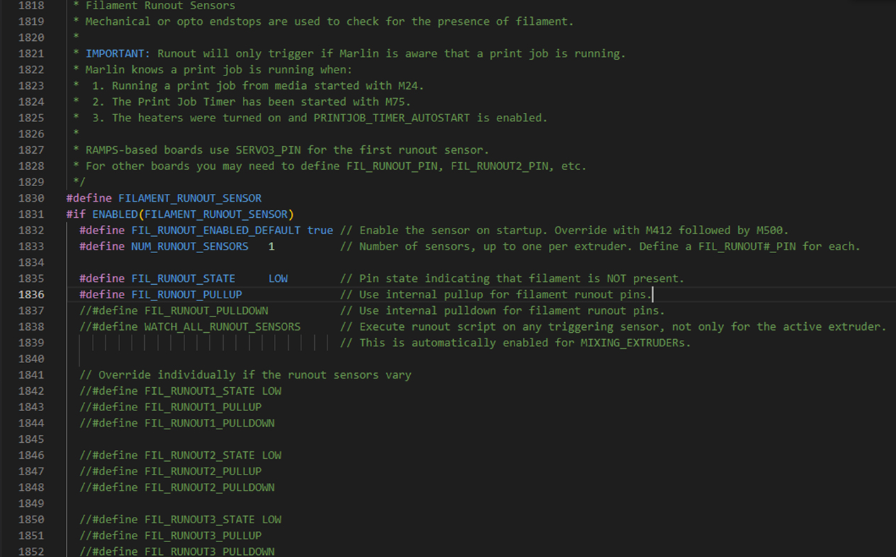
Next are filament runout sensors at line 1818 (configuration.h). The easiest way to set up a runout sensor is to use a normal endstop with a little roller at the end. That roller is pretty important, without it if you yank out the filament it will bend or even break the metal strip rendering the switch useless or unreliable. There are other options like an opto-sensor which I find to be much more reliable, I have never had a problem with the sensor on the Prusa mk3, but endstop sensors are just so easy to add, they’re cheap and with the right design, they can work just fine. So if you want one then uncomment filament_runout_sensor at line 1830, you want #define FIL_RUNOUT_ENABLED_DEFAULT enabled and set to true and you only need 1 unless you have a dual extruder so set #define NUM_RUNOUT_SENSORS to 1, you definitely want the M600 command enabled (more on that a bit later) so turn on line 1877 (configuration.h).
You also need to find ADVANCED_PAUSE_FEATURE at line 2752 (configuration_adv.h) and uncomment that. There is a lot of other fine-tuning you can do here and Marlin has some very helpful explanatory comments next to them that are quite easy to understand. Change them as you wish to what suits your printer.
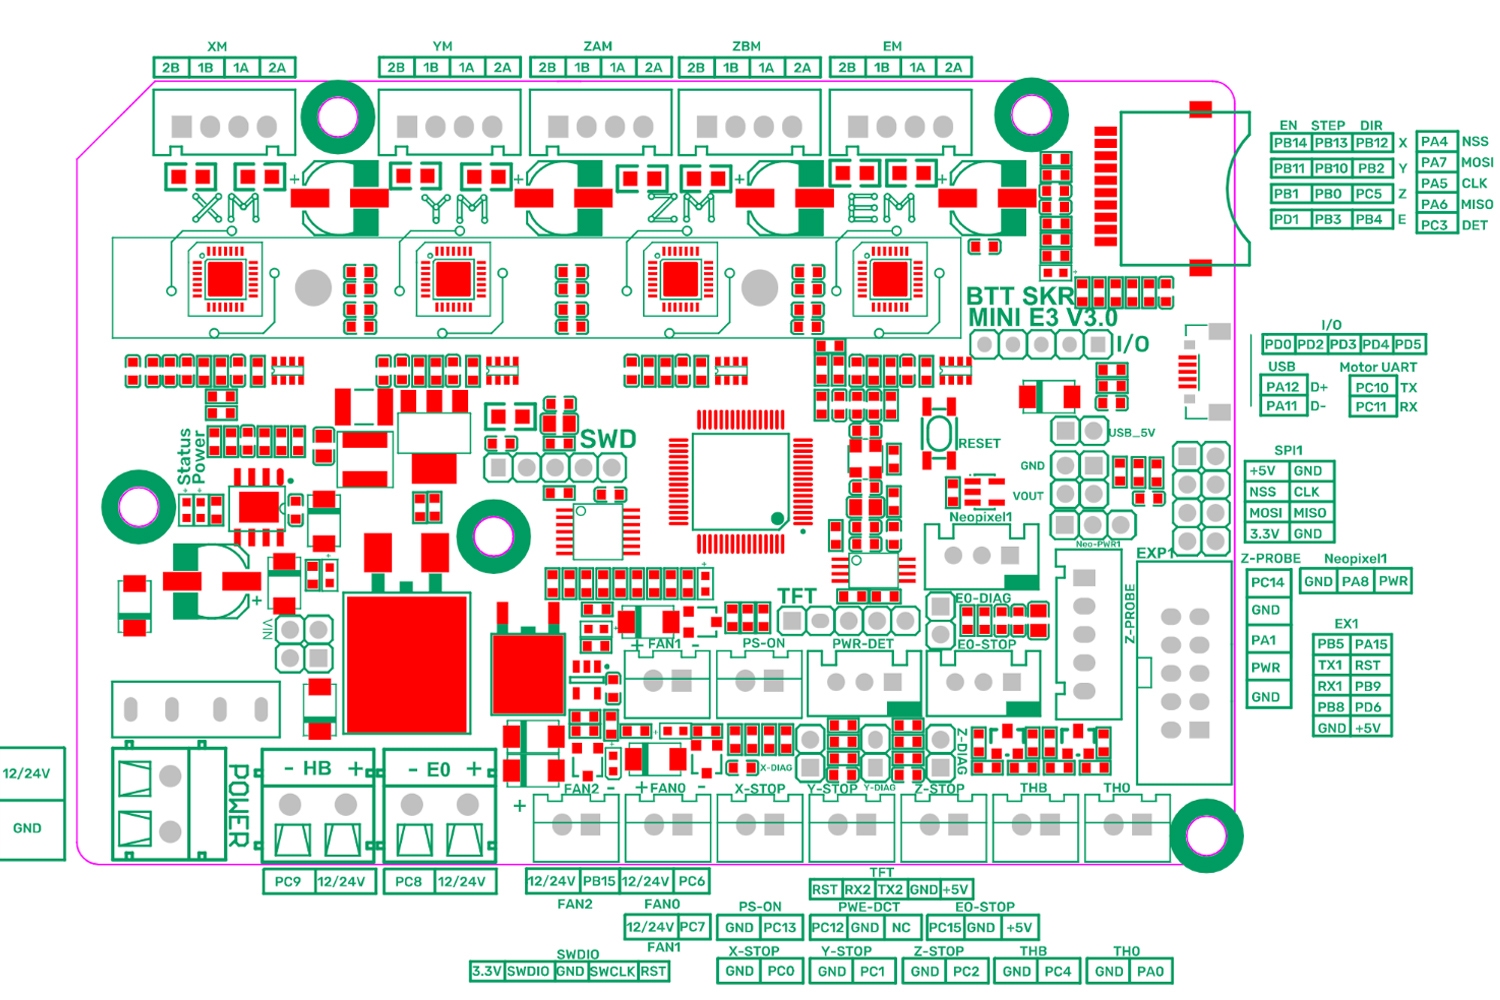
Now all you need to do is plug it in and that will depend on your board but you can also change it if you want. To check where the default pin is, you can go to SRC, PINS and your processor model, select it and hit CTRL F and type FIL_RUNOUT_PIN, for us on a BTT SKR e3 Mini V3.0 the pin is PC15, go to Google and type in the name of your board and pinout diagram and take a look at where that pin is.
15. M600 Command
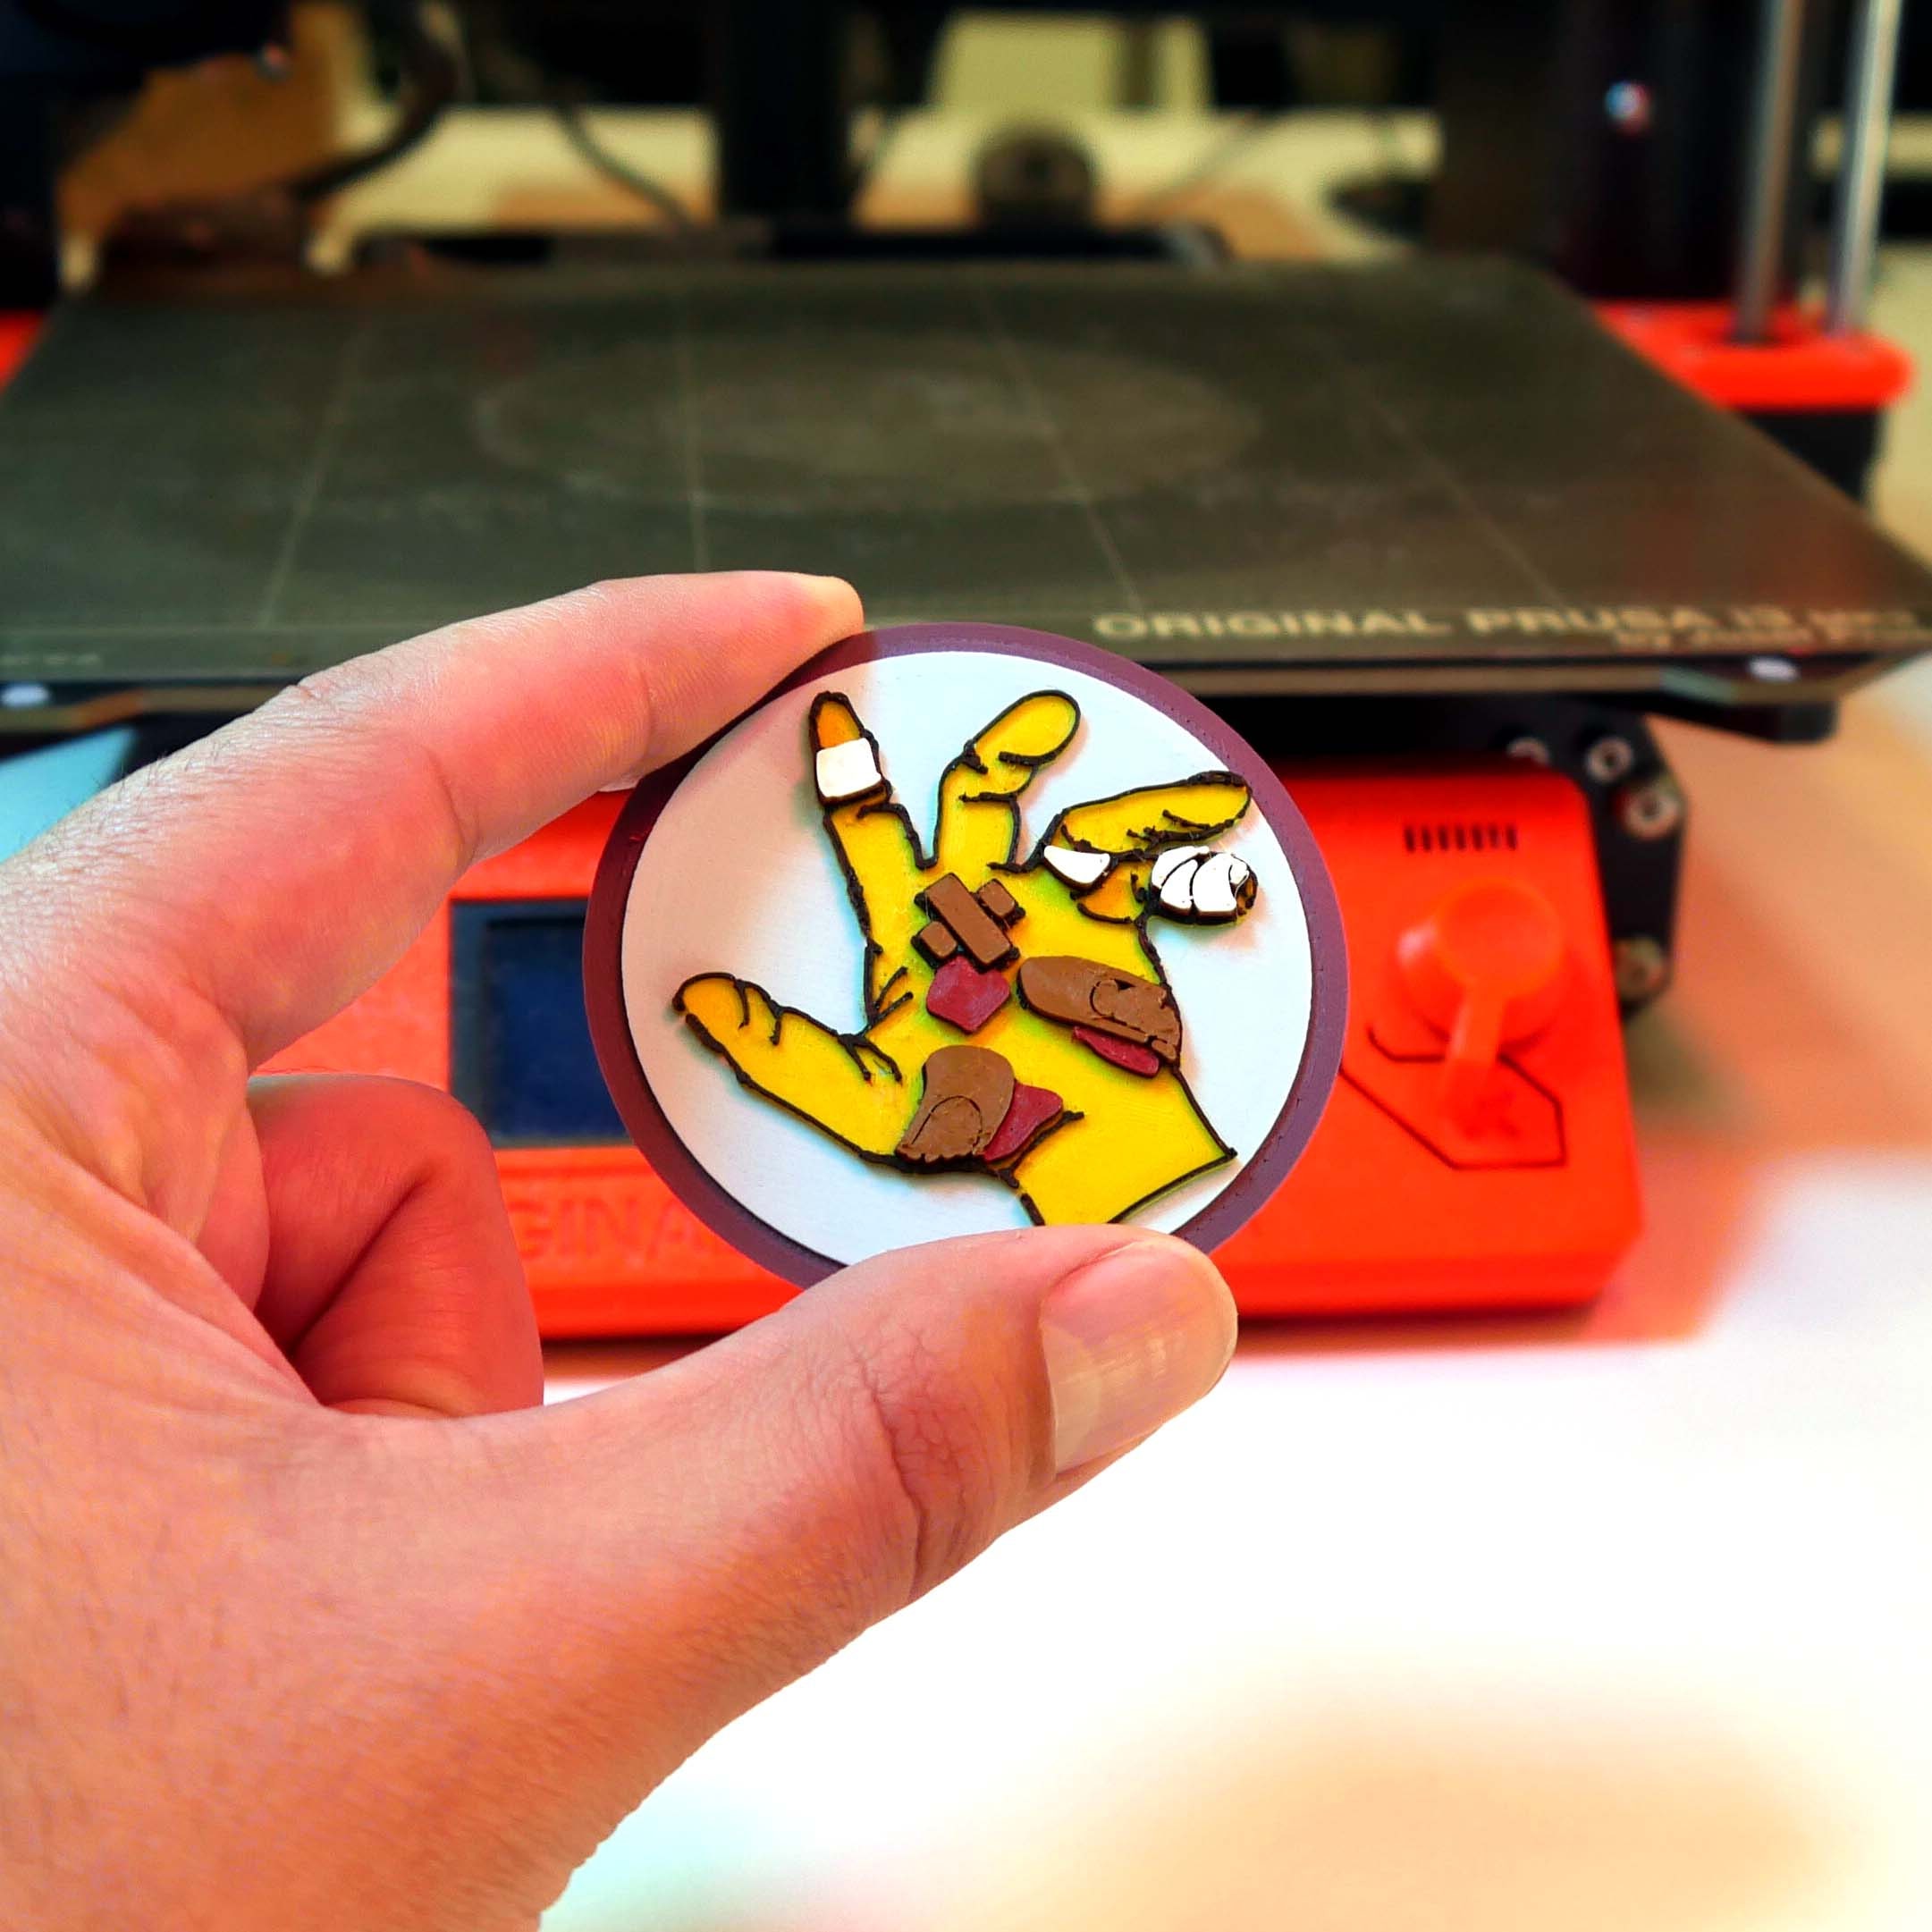
So we mentioned the M600 command before. This is an unfortunately underused firmware feature but really useful and that is swapping filament during the print. If you want to print the first few layers in one colour, the next few in another and then just keep changing colours you can with this feature. The M600 command will pause the printer, move the printhead to a suitable parking position and allow you to change the filament. Check out this badge we made using the M600 command.
So we have already enabled M600 and the advanced pause feature earlier on, now we need to enable the feature that parks the printhead. So go to line 2362 and enable nozzle park (configuration.h), you can change the position here if you want and the speed too under feedrate and a minimum z feed rate.

Now go to line 824 and enable extrude max length (configuration.h) with this it will feed in new filament to this length which is enough to purge old filament and change the colour totally. This value will depend on whether you have a bowden or a direct drive. If you have a bowden with a long PTFE tube this needs to be pretty high, with a direct drive it can be low.
Go back to the advanced pause feature in configuration_adv.h and make sure PARK_HEAD_ON_PAUSE is uncommented so the nozzle gets parked (configuration_adv.h)
16. Additional Functions - EEPROM, Preheat Settings, Nozzle Cleaning, Passwords, Language, Encoder Sensitivity, LCDs, Neopixels
Next up is EEPROM at line 2291 and this should definitely be enabled (configuration.h) - it is like the save feature on your printer. So if you change something, basically anything with a gcode command, you can save it with an M500 command and it will stick. Without this, the printer will just reboot with the firmware settings you have set on your computer. It makes things really handy.
Next is preheat constants at line 2335 (configuration.h) and like EEPROM it should be there by default although sometimes the values are not that great. I like to have these a bit higher than the actual print temperature but it's a small thing. By default, these are set to just PLA and ABS temperatures but maybe you normally don’t use one of those or maybe you need lots of presets, you can add up to 10.
Next is the clean nozzle feature at line 2374 (configuration.h). This is useful for a dual extruder printer but it could also be a bit useful for single extruder printers too maybe if you’re very obsessive about the perfect first layer.
Next is passwords at line 2498 (configuration.h) - maybe you don’t want your kid using the printer or a roommate who doesn’t quite understand boundaries, could be useful I guess, but if you are the only one with access to your printer, pretty useless.
We also have LCD support settings at line 2529 (configuration.h). English or Chinese isn’t your first language, no probs, you have a few to choose from. If your controller uses an encoder wheel you can change the sensitivity at line 2602 (configuration.h). Further down the controller setting you can choose your controller, perhaps one that has SD card support or maybe a touchscreen. An easy touchscreen to set up would be the CR-10 stock display, this is a very simple controller with an encoder wheel that is used in a lot of the CR-10 series and Ender series printers.
You could also upgrade your printer to have Neopixels which are LEDs you can attach to your printer for better lighting or a cool light show and these can be controlled via the menu which is really nice. Check these settings out at line 3450 (configuration.h).
Lastly is one new and very cool feature which is Input Shaping. This is a new feature in Marlin that can cancel out the vibrations that may cause unsightly defects in your print. We've already created a video and guide to help you set it up.
This list by no means covers everything but just gives an overview of what general changes are often made. If you have any issues with a particular part of the Marlin firmware or would like to see this list expanded, let us know. We will expand this guide in the future to help you with any changes you want to make.
Latest reviews
-

-
Spectrum FlameGuard ASA 275 Polar White, 1,75 mm / 250 g
- Self-extinguishing properties meet UL94 V0 standards
- Improved mechanical properties
- UV & weather resistance
-
The Filament ASA Midnight Black, 1,75 mm / 1000 g
- UV-resistant & weatherproof
- Excellent thermal resistance
- Good mechanical properties
Magazine Articles:
Discover 3DJake:
-
Great Britain: Free standard delivery from £69.90
-
Free
returns More than 10.550 products
We deliver worldwide to
more than 40 countries
