6 Affordable 3D Printers for Beginners (2026 Edition)
June 2026
Finding the right 3D printer for beginners has, paradoxically, become more difficult in 2026. Not because the printers have become worse, but because the choice of genuinely good entry-level models has exploded. Features that were once the reserve of professional printers just two years ago, such as multicolour printing, AI error detection and enclosed print chambers, are now available at a fraction of the price.
In this article, we'll take a closer look at six particularly popular models, all of which are excellent choices for beginners. We'll take a look at the technical details, how they differ in price and why these printers make it easy to get started. Our aim is to make your decision easier and help you get into 3D printing with as little stress as possible.
We'll be looking at the following models:
- Bambu Lab A1 mini for complete beginners
- Anycubic Kobra X a multicolour bargain
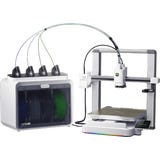
- Creality SPARKX i7 Combo a hassle-free, all-in-one package
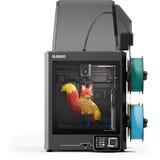
- Elegoo Centauri Carbon 2 Combo an enclosed multicolour workhorse
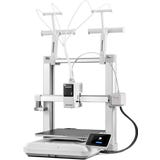
- Snapmaker U1 a toolchanger revolution without material waste
- Bambu Lab P2S Combo the perfect all-rounder
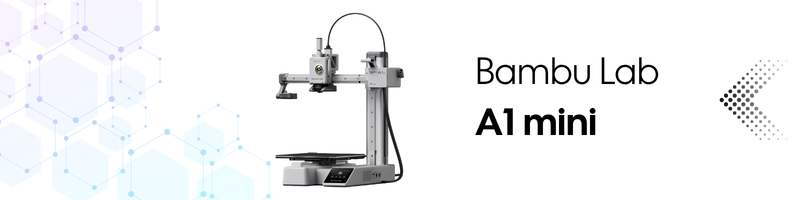
Does 3D printing sound like rocket science to you? The Bambu Lab A1 mini puts that myth to rest and, even in 2026, shows just how it can be to get started with 3D printing. Everything that can be frustrating with other 3D printers, such as calibration, checking belt tension and aligning the nozzle, is handled automatically in the background by the A1 mini, so you do not have to spend hours experimenting.
► Your benefits:
A major advantage for beginners is the carefully considered plug-and-play concept of the A1 mini. The printer arrives pre-assembled, aligned and precisely tuned. Unpack it, and after around 20 minutes to set it up, you're good to go.
Despite its compact size, the printer packs plenty of technology under the hood. The sturdy metal frame and high-quality linear rails on all axes ensure smooth running and precise print movements, even at higher speeds. One of the real highlights is the fully automatic calibration. The A1 mini independently measures the nozzle distance, levels the print bed, monitors belt tension, calibrates vibrations and even optimises the filament flow rate. As all of this happens discreetly in the background, you'll barely notice it, but you'll benefit from smooth operation and consistently high print quality. And all this at a noise level of under 48 dB, making it pleasantly quiet even when you are working right next to it.
When it comes to maintenance, this compact powerhouse also scores highly with its clever system. The quick-swap hotend can be replaced in a single movement. The stainless steel nozzle is designed for temperatures up to 300 °C, giving you plenty of flexibility if you later want to experiment with other materials. For beginners who do not want to dive straight into the technical details, this is a huge advantage.
The A1 mini is controlled via a modern, intuitive user interface that is easy to operate both directly on the printer and via the app. And if you ever run out of ideas, Bambu Lab’s MakerWorld platform offers countless free models, inspiration and creative projects.
By the way: with the optional AMS lite multimaterial system, even the compact A1 mini becomes a multicolour printer with up to four colours, should you feel like adding colour later on.
Conclusion: The Bambu Lab A1 mini is still the perfect printer for getting started in 2026. Thanks to automatic calibration, clever operation and a stable build, you absolutely do not need to be a technical expert to achieve high-quality results. Anyone looking to start with a small budget and limited space will struggle to find a better option right now. Highly recommended.

Multicolour printing for under €300? It may look like a typo, but that is exactly what the Anycubic Kobra X is. This new arrival in early 2026 prints in four colours straight out of the box, without an external add-on unit. Anycubic has integrated the entire colour-changing system directly into the print head, and that is precisely what makes the Kobra X one of the most exciting entry-level printers of the year.
► Your benefits:
What makes the Kobra X stand out is its integrated ACE GEN 2 technology. Instead of feeding filament through long tubes from an external material station, the 4-colour system sits directly on the toolhead. The result: faster colour changes, fewer potential sources of error and up to 81% less material waste when changing colours. Your filament ends up in the model, not in the bin. The Kobra X also makes getting started easy: automatic 49-point levelling, dynamic flow control and vibration compensation all run completely without any input from you. Unpack, switch it on and print - it's as easy as that.
With a build volume of 260 x 260 x 260 mm, the printer offers plenty of space for your projects. With print speeds of up to 600 mm/s, or 300 mm/s in standard mode, even larger models are completed quickly. An AI camera monitors your print, detects errors early and can even create time-lapse videos for your next social media post.
And if four colours are not enough for you at some point, the system can be expanded to up to 19 colours with additional ACE modules. The Kobra X simply grows with your ambitions.
Conclusion: The Anycubic Kobra X makes multicolour printing more affordable and straightforward than ever before. Anyone who wants multicolour printing from the start without blowing the budget gets a clever complete package that makes even significantly more expensive systems look outdated.

Unpack, plug in & print - all in under five minutes? The Creality SPARKX i7 Combo makes this its mission. Creality’s latest entry-level printer arrives fully assembled and takes care of everything that could make 3D printing tricky and complicated from the very first moment. It also comes with the CFS Lite multicolour system, including a feature that is extremely rare in this price range: enclosed filament storage.
► Your benefits:
The SPARKX i7 is designed from the ground up for a worry-free start. Automatic levelling, internal calibrations and preconfigured print profiles are all handled entirely by the printer. Simply choose a model and press start. An integrated AI camera monitors your print in real time and detects typical problems such as spaghetti failures or filament tangles, before an entire spool ends up in the bin. This is a safety net that beginners, in particular, will really appreciate.
The CFS Lite system enables multicolour printing with up to four colours and protects your filament at the same time. The enclosed housing with desiccant reliably shields your spools from moisture, one of the most common causes of poor print quality. Creality filaments with RFID chips are automatically detected, and the correct print parameters are applied straight away. Another real ace up its sleeve: the CFS Lite can even process flexible filaments such as TPU, something most multicolour systems in this price range struggle with.
With a build volume of 260 x 260 x 255 mm, print speeds of up to 500 mm/s and a 300 °C hotend, the technical specifications are strong too. Particularly appealing for home use: in night mode, the printer works as quietly as turning the page of a book, while the freely programmable RGB light strip shows the print status at a glance.
Good to know: The CFS Lite is designed for four colours and cannot be expanded. Anyone planning more colour variety in the long term may want to look at the next class up.
Conclusion: The Creality SPARKX i7 Combo may be the most worry-free complete package in this list: ready to go in minutes, AI-monitored and equipped with clever filament protection. Anyone who simply wants to print in colour without dealing with technical details is in exactly the right place here.

The Elegoo Centauri Carbon was one of the most popular entry-level printers of last year. Now Elegoo has gone one step further with the Centauri Carbon 2 Combo. It brings everything that made its predecessor so strong and adds a complete 4-colour system on top. Enclosed chamber, CoreXY power and multicolour printing in one machine, at a price that puts pressure on the competition.
► Your benefits:
At the heart of the Combo is the new CANVAS system. It holds four filament spools, handles automatic colour changes and detects materials via RFID chip. The printer then suggests the right settings automatically. If a spool runs out during printing, the backup function automatically switches to the next one. In other words, you do not have to worry about a thing.
Even without colour printing, the technology is impressive. The stable CoreXY system prints at up to 500 mm/s, while fully automatic calibration takes care of bed levelling, Z-offset and vibration compensation for you. The enclosed print chamber ensures constant temperatures and reliably prevents warping. Combined with the 350 °C high-temperature hotend, this also makes the printer well suited to technical materials such as ABS, ASA or carbon fibre-reinforced filaments. An integrated AI camera monitors your print, detects errors early and creates time-lapse videos on request. This means you stay in control at all times, even when you are away from the printer.
Conclusion: The Elegoo Centauri Carbon 2 Combo is the enclosed multicolour workhorse for anyone who wants more than PLA experiments. Enclosed chamber, 350 °C hotend and 4-colour system at this price: that is a clear statement to the entire industry. A printer that grows with you instead of holding you back.
Elegoo Centauri Carbon 2 Combo

Four nozzles instead of one... why has no one made this affordable before? The Snapmaker U1 brings technology to the entry-level segment that was previously reserved for professional machines costing several thousand euros: a true toolchanger. Instead of laboriously changing filament and purging the nozzle with every colour change, the U1 simply swaps the entire print head in just 5 seconds.
► Your benefits:
At the heart of the U1 is the SnapSwap™ system with four independent print heads. Each toolhead has its own hotend, its own nozzle and its own filament path. The key advantage over conventional multicolour systems is that no filament needs to be purged. While other printers send a considerable amount of material into the waste container with every colour change, the U1 can save up to 80% filament. That is good for your wallet and for the environment.
And there is no need to worry about precision. Intelligent calibration algorithms automatically synchronise all four toolheads and compensate for offsets with an accuracy of under 0.04 mm. You get clean transitions between colours without ever needing to make manual adjustments.
The U1 is also designed for easy operation in other areas. The CoreXY system with lightweight carbon fibre axes prints at up to 500 mm/s, while the generous build volume of 270 x 270 x 270 mm offers room for ambitious projects. Automatic filament management loads your spools independently, detects official Snapmaker filaments via RFID and, in backup mode, even switches automatically to a new spool if one runs out.
The U1 is also a real insider tip for anyone who wants to work with several materials at the same time. Since each print head keeps its own filament, rigid and flexible materials or soluble support structures can be combined easily in a single print. This is something filament-based changing systems often struggle with. Good to know: for high-temperature materials such as ABS or ASA, the optionally available enclosure is recommended, as the U1 has an open design as standard.
Conclusion: The Snapmaker U1 makes toolchanger technology affordable for beginners for the first time and solves the biggest frustration in multicolour printing: material waste. Anyone who wants colourful, fast and more sustainable printing gets a piece of the future for their desk.
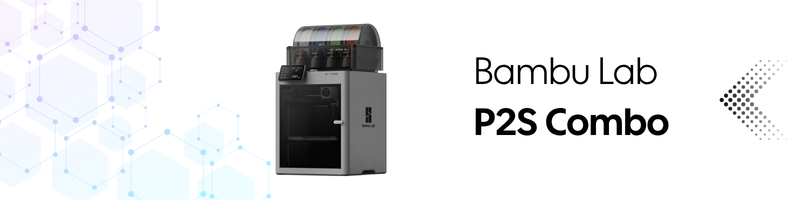
You want to get into the world of 3D printing, but do it properly from the start, with power, precision and creative freedom? Then the Bambu Lab P2S Combo is made for you. The successor to the legendary P1S combines the completely redesigned P2S 3D printer with the intelligent AMS 2 Pro system, giving you everything you need to bring your ideas to life in colour, reliably and without technical frustration.
► Your benefits:
The P2S has been developed from the ground up and adopts technology from Bambu Lab’s high-end H2 series. The new DynaSense Extruder with servo drive ensures precise filament feeding, while automatic flow calibration delivers flawless surfaces without manual tuning. AI error detection monitors your print using computer vision and identifies typical problems, such as stringing, before they ruin your model. It even checks whether the correct build plate has been inserted.
The Active Airflow System is particularly clever. Instead of simply circulating warm chamber air, the P2S draws in cool outside air when needed or keeps the chamber consistently warm for high-temperature materials. An activated carbon filter helps maintain cleaner room air. This allows you to print PLA with perfect overhangs and ABS without warping, both with the door closed.
Operation is handled via the new 5-inch touchscreen with a smooth second-generation user interface, a huge leap forward compared with its predecessor. The Full HD camera with improved LED lighting provides razor-sharp live views and timelapses for your next post.
And then there is the AMS 2 Pro: four active spool slots, integrated filament drying, RFID recognition and ultra-fast material changes. Up to four colours are available straight out of the box, and with expansion, even up to 16. The system automatically recognises Bambu filaments and applies all settings for you. You get professional results without having to spend hours reading up beforehand.
Conclusion: The Bambu Lab P2S Combo gives you everything you need for a successful, stress-free start, with plenty of room to grow. This smart combo thinks along with you, works precisely and gives you the freedom to focus on what really matters: your ideas. A 3D printer that does not overwhelm beginners, but genuinely encourages them.
And now for the all-important question: what about the price? (As of June 2026)
Not everyone wants to spend a fortune when getting started with 3D printing, and these days, you really do not have to. Whether you are looking for an affordable all-rounder, a fast multicolour solution or a fully automated high-end machine, there is a suitable 3D printer for every budget. Here, we show you how our six favourites compare in terms of price, and why they are especially worthwhile for beginners.
► Affordable and beginner-friendly 3D printers up to €400 – a clever start on a smaller budget
In this price category, you get more technology for your money in 2026 than ever before, now even including multicolour printing.
⇒ The Bambu Lab A1 mini is a fully automated system that handles calibration, belt tension and flow rate adjustment by itself. At the current price, that is almost absurdly good. You'll avoid technical frustration and get print quality you would normally expect from printers of a significantly higher price range.
⇒ The Anycubic Kobra X achieves something that would have been unthinkable not long ago: true 4-colour printing below the €400 mark, without an external add-on box and without tinkering. Anyone who wants to print in colour from the very beginning will currently struggle to find better value for money.
► Beginner-friendly 3D printers under €500 – high speed and technology with excellent value for money
Already in this price category, you'll get technology that goes well beyond typical entry-level features, at a price that is still lower than many smartphones.
⇒ The Creality SPARKX i7 Combo is the worry-free all-round package in this class: fully assembled, ready to go in under 5 minutes, with AI monitoring and CFS Lite including enclosed filament storage with moisture protection. Anyone looking for maximum convenience with minimal learning effort will find it here.
⇒ The Elegoo Centauri Carbon 2 Combo is the technical standout in this class: enclosed chamber, CoreXY system, 350 °C hotend and integrated 4-colour system. Features that would have cost well over €1,000 just a few years ago are now available for under €500.
► Beginner-friendly 3D printers under €1,000 - premium comfort that would otherwise cost twice as much
Upwards of €500, completely new possibilities open up, especially if you're looking for convenience, colour variety and fully automated workflows.
Anyone who wants to invest straight away in a system that will leave nothing to be desired for years to come will find what they are looking for here.
⇒ The Snapmaker U1 brings true toolchanger technology below the €1,000 mark. Four independent print heads, tool changes in 5 seconds and up to 80% less filament waste: anyone who prints a lot and in colour will recoup the extra cost through saved material faster than they might think.
⇒ The Bambu Lab P2S Combo is almost a bargain considering its features: DynaSense Extruder with servo drive, AI error detection, Active Airflow System, Full HD camera and the AMS 2 Pro with filament drying and RFID recognition. This is high-end technology packed into a setup that does not put obstacles in the way of beginners.
In short: If you are starting with a small budget, the Bambu Lab A1 mini is the best choice, or you can go straight for the Anycubic Kobra X if you want to print in colour from the outset. If you are looking for the most convenient complete package, the Creality SPARKX i7 Combo is your candidate. If you need an enclosed chamber for technical materials, there is no getting around the Elegoo Centauri Carbon 2 Combo. And if you want to invest in a premium system right away that will support you long term, 2026 gives you a choice for the first time: the Snapmaker U1 for waste-reduced multicolour printing with a tool changer, or the Bambu Lab P2S Combo as a fully automated all-rounder for starting 3D printing at a professional level.
Comparing the technology – what's inside?
Price is one thing, but what about the technical aspects? Anyone getting started with 3D printing will want to know the following: What's the print speed? Which materials does it support? And what makes it easier to get started with 3D printing? This is where it is worth taking a closer look. Even if many printers appear similar at first glance, the details often reveal clear differences in print speed, hotend temperature, build volume or automation. We have compiled a table listing the most important technical specs of the five models so you can compare them directly and decide which one best suits your requirements.
| Bambu Lab A1 mini | Anycubic Kobra X | Creality SPARKX i7 | Elegoo Centauri Carbon 2 Combo | Snapmaker U1 | Bambu Lab P2S Combo | |
| Device dimensions | 347 x 315 x 365 mm | 455.4 x 445.3 x 461.3 mm | 470 x 423 x 456 mm | 500 x 480 x 743 mm | 584 x 499 x 730 mm | 392 x 406 x 478 mm (P2S) 372 x 280 x 226 mm (AMS 2 Pro) |
| Net weight | 5.5 kg | 9.5 kg | 9.12 kg | 19.35 kg | 18.2 kg | 14.9 kg (P2S) 2.5 kg |
| Build volume | 180 x 180 x 180 mm | 260 x 260 x 260 mm | 260 x 260 x 255 mm | 256 x 256 x 256 mm | 270 x 270 x 270 mm | 256 x 256 x 256 mm |
| Max. print speed | 500 mm/s | ≤ 600 mm/s | ≤ 500 mm/s | 500 mm/s | 500 mm/s | 500 mm/s |
| Max. acceleration | 10,000 mm/s² | ≤ 20,000 mm/s² | ≤ 10,000 mm/s² | 20,000 mm/s² | 20,000 mm/s² | 20,000 mm/s² |
| Max. print temperature | 300 °C | 300 °C | ≤ 300 °C | 350 °C | 300 °C | 300 °C |
| Max. heated bed temperature | 80 °C | 110 °C | ≤ 100 °C | 110 °C | 100 °C | 110 °C |
| Extruder | Dual Gear Direct Drive | Direct Drive | Direct Drive | Direct Drive | Direct Drive with 4 toolheads | Direct Drive |
| Device display | 2.4-inch IPS touchscreen | 3.5-inch capacitive touchscreen | 2.85-inch touchscreen | 5-inch full-colour capacitive touchscreen | 3.5-inch touchscreen | 5-inch touchscreen |
| Interfaces | WiFi, Bambu Bus, MicroSD | USB | USB, WiFi | USB, WiFi | WiFi, USB flash drive | WiFi, USB |
| Voltage, power | 100-240 V 150 W |
110 V, 60 Hz 1450 W |
100-240 VAC, 50/60 Hz 700 W@220 V 400 W@110 V |
100-240 VAC, 50/60 Hz |
100-120 VAC 220-240 VAC 400 W@100-120 V 1150 W@220-240 V |
100-120 VAC 200-240 VAC 50/60 Hz 1200 W@220 V 1000 W@110 V |
| Supported filaments | PLA, PETG, TPU, PVA |
Single-material printing: PLA, PETG, TPU(95A/64D/68D), PVA, ABS Multi-material printing: PLA + TPU(68D), PLA + PVA, TPU(68D) + TPU(68D) |
PLA, PLA Silk, PETG, TPU, PLA-CF | PLA, PETG, TPU, PLA-CF |
PLA, PETG, TPU, PVA, PCTG (Basic) PET, ABS, ASA, PA, PC (with Top Cover) CF- & GF-reinforced polymers (with Top Cover & hardened nozzle) |
PLA, PETG, ABS, ASA, TPU, Support for PLA, Support for PLA/PETG, Support for ABS, PET, PA, PC, PVA, PLA CF, PETG CF, ABS GF, ASA CF, PA6-CF, PA6-GF, PAHT CF, PPA CF, PET CF |
Our conclusion: there has never been a better time to get started
If this comparison shows one thing, it is this: 2026 is the best year yet to start your 3D printing journey. What used to involve patient tinkering, frustration, and expensive lessons is now plug-and-play. Features such as multicolour printing, AI monitoring and fully automatic calibration, which would have required a four-figure budget only a few years ago, are now becoming standard features across every price class.
Which printer is ultimately the right one for you depends less on your skill level, as all six are beginner-friendly, and more on what you want to do.
Do you simply want to get started and find out whether 3D printing is for you? Then you can't go wrong with the Bambu Lab A1 mini: compact, reliable and backed by one of the largest communities. If you want colour from the start, the Anycubic Kobra X with its integrated 4-colour system is the best value-for-money tip, while the Creality SPARKX i7 Combo offers the most convenient complete package, including filament protection and an AI monitoring. If you plan to print technical materials such as ABS or carbon filaments eventually, the Elegoo Centauri Carbon 2 Combo is an excellent choice. And if you want to go all in, you can choose between two premium approaches: the Snapmaker U1, whose tool changer tackles the waste problem of multicolour printing at its source, or the Bambu Lab P2S Combo, the worry-free all-rounder that can simply do everything.
Whichever of these 6 options you choose, you'll get a printer that won't hold you back, but will grow with your ideas. The hardest part of your 3D printing journey is no longer the technology, but deciding what to print first.
Still unsure or have questions about one of the models? Our support team will be happy to help, and in our Discord community, you will find thousands of makers who started exactly where you are now. Enjoy printing!
FAQs: Frequently asked questions about 3D printers for beginners
Which 3D printer is the best for beginners in 2026? For most newcomers, the Bambu Lab A1 mini is the best choice: it is affordable, comes pre-assembled, calibrates itself fully automatically and delivers high-quality results without prior knowledge. Anyone who wants to print in multiple colours from the start should choose the Anycubic Kobra X, the Creality SPARKX i7 Combo or the Elegoo Centauri Carbon 2 Combo.
How much does a good 3D printer for beginners cost? Good beginner-friendly FDM printers are regularly available from around €320 in 2026. Multicolour complete packages range from around €390 to €450, while fully automated premium systems such as the Bambu Lab P2S Combo or Snapmaker U1 are between €750 and €900. Thanks to regular promotions, many models are temporarily available at significantly lower prices.
Do I need a multicolour 3D printer as a beginner? No, but in 2026 multicolour printing hardly costs much more. Machines such as the Anycubic Kobra X already print in four colours for under €400. Anyone who wants to eliminate material waste altogether during colour changes should choose the Snapmaker U1 with toolchanger technology. If you mainly print functional parts, a single-colour printer such as the Bambu Lab A1 mini is the more affordable and simpler route.
What is a toolchanger 3D printer? A toolchanger such as the Snapmaker U1 has several complete print heads, which it automatically swaps during colour or material changes instead of purging filament through a single nozzle. This saves up to 80% filament and reduces changeover time from around two minutes to just a few seconds.
FDM or resin - which is better for beginners? For most beginners, FDM is the better choice. This type of filament is cheaper, easier to handle and does not produce the vapours or chemical residues associated with resin printing. Resin is best suited for very detailed miniatures.
How difficult is it to get started with 3D printing? Much easier than its reputation suggests. Modern entry-level printers come pre-assembled, level the print bed automatically and include ready-made print profiles. With all six models presented here, it usually takes less than 30 minutes from unboxing to the first print.
Related products
-
-
Anycubic Kobra X
- Build volume: 260 x 260 x 260 mm
- 4-colour printing, can be expanded to 19 colours
- Print speed up to max. 600 mm/s
-
Creality SPARKX i7 Combo
- Build volume: 260 x 260 x 255 mm
- Multicolour printing up to 4 colours
- Automated colour change
-
Elegoo Centauri Carbon 2 Combo
- Multicolour printing
- 350°C high-temp nozzle
- Smart build chamber temperature control
Magazine Articles:
- Get Rid of Z Seams: How to Get Smooth Surfaces with Scarf Seam
- YouTube Episode: Meet the Maker with Wyatt Weaver of Atom Engineering
- YouTube Episode: Meet the Maker with the Masterminds behind Kamui Cosplay
- This is how you create a creative Lithophane lamp with a 3D printer
- YouTube Episode: The Elegoo Centauri Carbon 2 - A Carbon Copy?
-
Great Britain: Free standard delivery from £69.90
-
Free
returns More than 10.400 products
We deliver worldwide to
more than 40 countries
