
High Speed Printing: Your Options
When it comes to high-speed printing, there are two things to consider. hardware and software. Hardware is the mechanical structure of the printer, software is the firmware that controls the device.
Hardware
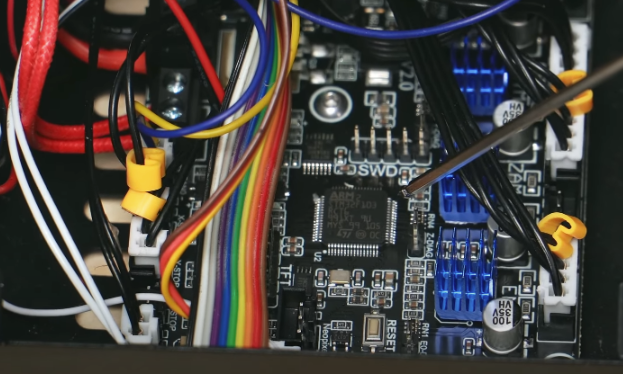
So let's start with the hardware. Most budget printers use roller bearings for traction. These are small rubber wheels that fit into grooves in aluminium extrusions. They are cheap and relatively easy to install and maintenance is also relatively easy. However, the problem is that they can shift when loose and bind to the aluminium when over-tightened, so over time these will need some adjustment or dimensional accuracy will suffer and lots of print artefacts will appear the higher you push those speeds.
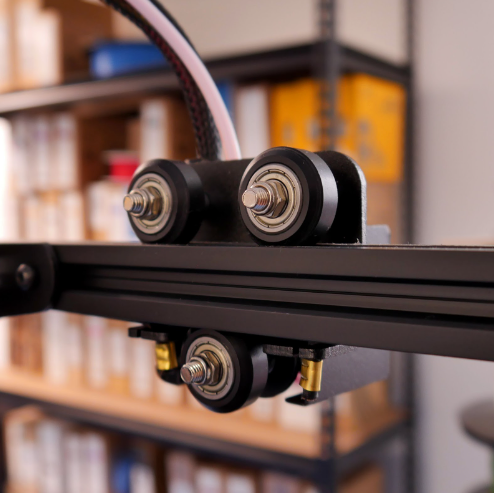
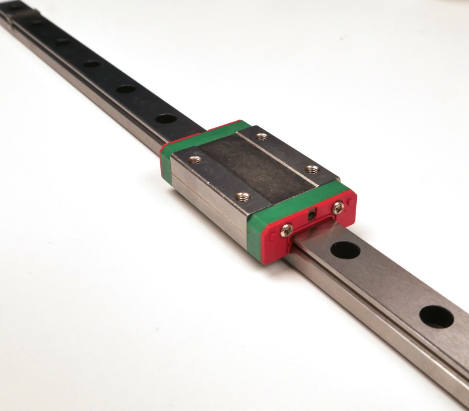
Upgrading to other forms of motion control will help like with linear bearings or linear rails. These are low-friction options and do not require tightening on their rods or rails. Very little maintenance is required, mostly only cleaning and lubrication. Linear bearings are relatively cheap although linear rails can be a bit higher in price but they are extremely rigid and the go-to motion components for high-speed printing. They are often found on the x and y-axis of CoreXY machines, sometimes you may even find them on the z-axis, consider the Voron Switchwire printer which has a CoreXZ motion system. You may even find them on community designs on cartesian bedslingers for all axes.
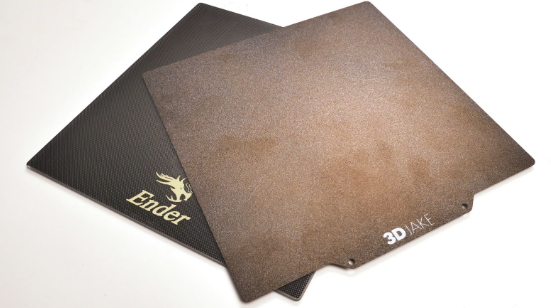
Reducing the weight of the moving parts can also help with vibrations. The heavier they are the more momentum they carry, and create higher forces when accelerating and decelerating. So lose that glass bed if you have one and get a nice light and very effective PEI sheet. Bedslingers especially will suffer from vibrations as the bed is a thick plate of aluminium. Other cartesians do not suffer from this for example the Ender 5 family of printers have a bed that only moves on the z-axis and that is only used for layer changes and z hops, no actual print moves.
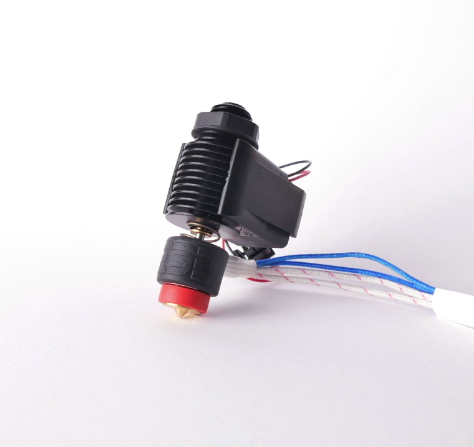
The same goes for the hotend. Do you have a direct drive system with a large stepper motor driving the extruder? That's not ideal. You can choose a pancake stepper motor as a replacement, or even better, a lightweight extruder with a small motor like the Bondtech LGX Lite.
Having a bowden set up is more beneficial for reducing vibrations due to their light weight but bowdens have other issues.
Firmware
So that would be hardware changes, what about firmware? This is where the story deepens and there are several options available. One is installing Klipper as your firmware. Usually, this involves using a Raspberry Pi, installing the firmware on that and letting it interface with your printer’s mainboard.
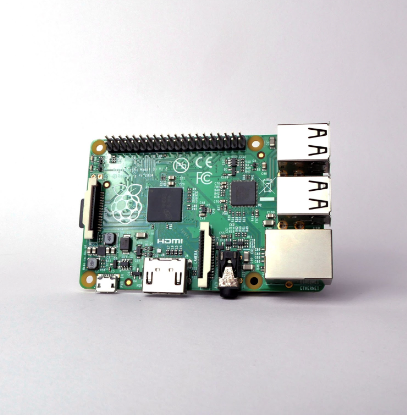
Essentially all the computing power is used by the Pi and your original board is delegated with simply carrying out the commands. Klipper has some serious advantages when it comes to the more common marlin-derived firmware on lots of printers these days. Firstly, Raspberry Pi’s have way more processing power than regular mainboards and can accommodate a lot of new or improved firmware features like pressure advance, it can also host an interface that you can interact with on your browser, Raspberry Pi’s have onboard wifi and an ethernet port so that is not an issue. You can also modify klipper firmware via this interface so no more SD cards and rebooting your printer, instead Klipper uses configuration files to control the mainboard and all its functions so all you need to do is open this text file in the web interface and adjust an instruction, it then saves and restarts and you’re done, no SD cards involved and no trawling through hundreds of lines and dozens of pages of firmware - cfg files are super short and concise. Pi’s have USB ports too so you can hook up a webcam to keep an eye on your print if you’re in a different room, there are also mobile phone apps that can connect to klipper so you can monitor on the go.
But the feature making the most noise in the community is input shaping. This is a feature which measures the resonance frequencies of a printer as it moves and compensates for them during the print. When your printhead speeds up or slows down it created a vibration to a specific frequency and basically, input shaping cancels out these unwanted vibrations resulting in you being able to push the speed a lot higher. The most well-known printers with Klipper firmware utilising input shaping would be the Voron range.
So sounds great right? Absolutely, there is just one snag, given supply chain issues over the last couple of years and the chip shortage, Raspberry Pis are pretty expensive and there are often long waiting periods to get one. Another issue is setting up a Pi with Klipper is not a flick-a-switch action, while there are great guides online for this, it is a bit much for those newly arriving in the 3d printing community.
So what can you do?
Well, there are different ways. The first is a main board that contains a secondary board that works just like a Pi. One possibility would be the Manta series from BIGTREETECH. The CB1 board simply snaps onto the Manta motherboard, and the installation process is similar to a regular Raspberry Pi. While it's a lot cheaper, there's still a lot you need to do to get it working: install the Pi system image, install Kipper with Kiauh, get SSH access, then compile the firmware. While the learning curve is not steep, for someone not familiar with these things, it can seem daunting.
The next option is the Klipper Pad and we have two in the shop, the Creality Sonic Pad and the FLSUN Speeder Pad. At the time of writing this, the Creality Sonic Pad has 21 pre-configured profiles mostly for its own printers but also for the Prusa Mini. The thing with the Sonic Pad is that it will support any printer that has the processor chips used in these 21 profiles. So while an Ender 3 S1 may use an STM32F104, a lot of other printers also use this chip, such as the Artillery Sidewinder X1 and X2 which use a Ruby mainboard. So this printer is also compatible with the Sonic Pad.
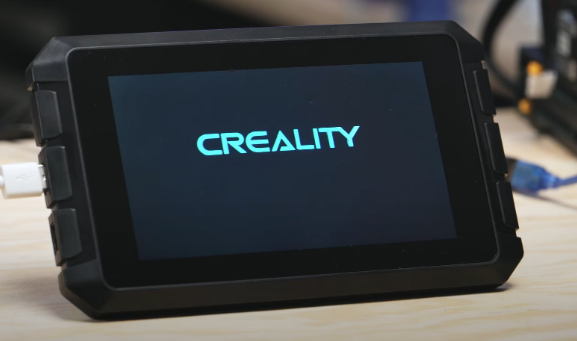
While there are a ton of printers compatible with the Sonic Pad, it is not suitable for all. One notable exception is the SKR Mini E3 V3.0 which is the go-to Mainboard upgrade for the Ender series as it is the same size as the original board so really easy to install and set up. This uses an STM32G0B1 which I’m afraid is not on the list.
To find out what chips are compatible with the Sonic Pad and how to install it for your printer, we made a video on the subject which you can find here.
Are there other options besides the pad? Well, that's where Marlin firmware comes in. You may be familiar with Marlin, which almost all budget 3D printer firmware is based on. It is open source, free to download and suitable for many printer mainboards. Marlin 2.1.2 was released in December 2022 and we tested it on some printers with great success. See our video about it here.
Setting up Marlin is a bit more difficult than setting up a pad, but luckily there are plenty of guides online that can help with this, and Marlin offers pre-configured firmware profiles for many printers. Just look here.
To set up Marlin, you first need a program to edit it. There are several, but we recommend Visual Studio Code.
You also need an extension called PlatformIO as an IDE to enable editing. You can search for it in VSCode's Extensions sidebar. Once you have these, you will need a fresh copy of Marlin. A Marlin 2.1.2 bug fix is available here.
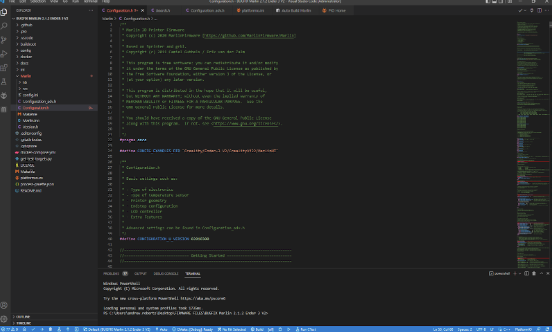
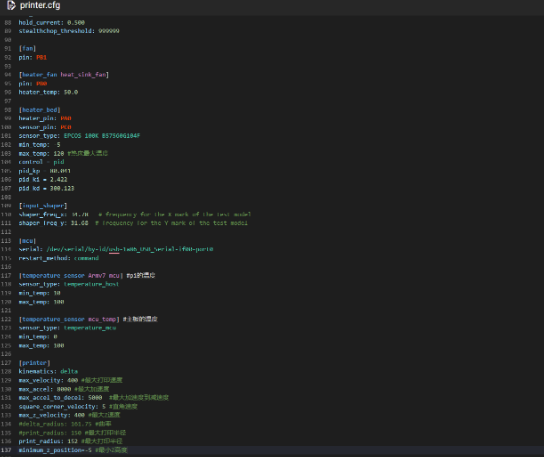
Download everything and open the folder in VSCode. Now you can download one of the configured profiles from before, the most important parts are the configuration.h and configuration_adv.h and these can be copied to the Marlin folder to overwrite the raw versions there. Unless you've modified your printer in some way, like new upgrades, then you're basically done with the initial setup. However, to get Marlin's input shaper working, you need to run some tests. First you have to activate input shaping in the firmware. To do this, open VSCode with the firmware, go to configuration_adv.h in the sidebar, press CTRL-F to start the search, type "input shaping" and you will be taken to the relevant section. Uncomment the lines:
//#define INPUT_SHAPING_X
and
//#define INPUT_SHAPING_y
Uncommenting simply means removing the double slash, which treats anything following the same line as a comment, not a command.
If you're using a screen like an LCD12864 (Ender 3's default screen), it would also be good to uncomment the line:
// #define SHAPING_MENU
This allows for a menu option for fine-tuning the input shaping values, making setup much more efficient as you don't have to edit the firmware every time the values are changed.
Now that input shaping is enabled in the firmware, you can compile the firmware. Just choosing the right configuration is not enough, as many printers have different mainboards, and even those mainboards can have different processors.
For example, the Ender 3 V2 could have a v4.2.2 motherboard or a v4.2.7 motherboard and the 4.2.2 board could have an STM32F103 chip or a GD32F303 chip. So go to the Configuration.h page in the sidebar and type CTRL-F and #define motherboard again to find the right line. For a Creality v.4.2.2 board or V4.2.7 it's as simple as changing the line to:
#define MOTHERBOARD BOARD_CREALITY_V4
You may not need to change anything for other printers, but the correct values for the mainboards used by Marlin are stored on the boards.h page. To find these go to the sidebar and click on "src" then "core" then "boards.h", here you will find a list of the usable boards, just look for the one that is built into your printer.
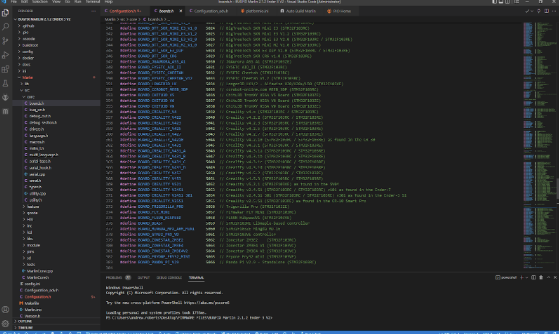
After that, you have to choose the right chip. Go to the sidebar, click on platformio.ini and at about the top of the page you will find the line:
default_envs = [CORRECT CHIP]
There you can fill in the correct chip (remember it is printed on the chip on your motherboard), luckily VSCode has an autofill option so you can easily select the right chip.
That’s it, you’re set up. Now all you need to do is compile the firmware and copy it to your SD card. To do so go to VSCode and at the bottom of the screen you’ll see a tick icon, click on that and it will start to check the firmware to see if there are any issues. This is really useful because mistakes happen so you’ll be given info about where the problem is if one is found. After a minute, it will be compiled and you can find the firmware file in the firmware folder you downloaded in the directory:
[FIRMWARE FOLDER] \.pio\build\ [CHIP MODEL] \
This is the .bin file you need. On some boards, you simply have to rename the file to firmware.bin. Before copying this file to an SD card, we recommend formatting the SD card. Once that is done and the .bin file is on the card, you can simply insert it into your printer and turn it on. Flashing the firmware only takes about 10 seconds or less. If you just get a blank screen with nothing changing, something went wrong, probably a firmware compatibility issue, so check that the correct board and chip model is selected. You may also need to check which stepper drivers have been selected in the firmware and make sure they match the motherboard.
Now you can start the test!
A good guide to testing can be found here.
Be sure to download and print the Ringing Tower stl here.
For this, we would recommend Prusa Slicer as you can edit the Gcode commands for each layer. This is important because you need to test frequencies between 15Hz and 60Hz. To do this in a single print, the frequency must be changed for each layer. For this we can use the Gcode command:
"M593 F{(layer_num < 2 ? 0 : 15 + 45.0 * (layer_num - 2) / 297)} ; Hz Input Shaping Test"
Enter this code in the Printer settings > After shift change G-code section of Prusa Slicer. Print the file with Spiral Vase enabled, with 0.2mm layer height and at a high speed, we tried 250mm/s for an Ender 3, for a CoreXY or Delta machine you can go even higher. Make sure any acceleration, jerk, or other speed-effecting settings are turned off; one setting that is easily overlooked is the minimum layer time in the cooling settings. In the printer settings, make sure that the machine settings are set to "Ignore". You also don't have to adjust the orientation of the model unless you're using a CoreXY printer. In this case, you should adjust the orientation by 45 degrees.
Once the print is complete, you can see how each frequency affected the ringing on each plane for the X and Y axes. Select the layer where the last ringing occurred and use callipers or a ruler to measure from the base to that layer. You can then enter this value here in the TH3D calculator, and you already have your values for the input shaping. However, we would recommend repeating the test to be thorough.
Now you can enter the values into the firmware. For us on an Ender 3 V2 we got a frequency of 56.36 for the x-axis and 45.00 for the y-axis so our firmware looks like this:
#define SHAPING_FREQ_X 56.36
#define SHAPING_FREQ_Y 45.00
Congratulations! The firmware is ready.....almost! We strongly recommend activating the linear advance if it is not already activated. Many printers still don't use this feature, which is unfortunate as it greatly improves the quality of a print when there are many speed changes or abrupt changes in direction. There used to be a compatibility issue with the Creality boards, but luckily it has since been fixed. Michael from Teaching Tech has a great guide to Linear Advance here.
Ok, now you're really done! For a standard Ender 3 V2, the best print speed is around 150mm/s, but if you upgrade your extruder and hotend you can achieve higher speeds, as the Ender 3 V2's extruder and hotend aren't really designed for those high speeds and flow rates are designed. Which extruder and hotend you should get depends on your printer, but if you want to try a Creality Ender series printer, the Sprite Extruder Pro would be a good option. This is a direct drive extruder and hotend combo with a maximum temperature of 300°C, so you can print a wider range of filament types, but you could also upgrade to something with a little more power like a Hemera, which you could also mount with a volcano block.
Have you already tried Marlin 2.1.2 with input shaping and the Creality Sonic Pad, which do you think works better? Let us know by commenting on our Youtube channel, where we regularly bring you reviews, original projects, tips and tricks!
Related products

Magazine Articles:
Discover 3DJake:
-
Great Britain: Free standard delivery from £69.90
-
Free
returns More than 10.450 products
We deliver worldwide to
more than 40 countries
